Toyota Testing Procedures
Toyota recommends testing the alternator by first inspecting the alternator wiring. Always wiggle-test the voltage regulator connector at the alternator when testing for an intermittent charging condition. Toyota also recommends inspecting the condition of the drive belt. Modern serpentine belts are made from EPDM rubber that doesn’t crack or peel like older belts. So, belt manufacturers usually supply free wear gauges to measure wear in the V-groove area. Newer vehicles might also incorporate a decoupler pulley that allows the alternator to “coast” during deceleration. If the decoupler pulley fails, the alternator won’t charge because it is “free-wheeling.”
Next, inspect the battery warning light to see if it illuminates as the ignition is turned on and if it turns off as the engine is started. If the battery warning light turns off with the engine running, accelerate the engine speed to 2,000 rpm. If the warning light doesn’t turn off, inspect the charging system as described in the sidebar on page 25, or in Toyota service information.
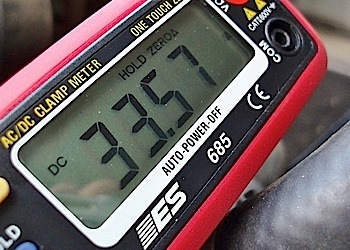
With the battery warning light off, standard charging current as measured at the alternator B+ wire should be 10 amps or less, and charging voltage should range between 13.2 to 14.8 volts. With the headlamps on and the HVAC blower turned to “Hi” position, charging amperage should be 30 or more amps. Since a fully charged battery might display less amperage, turning on additional accessories like the rear-glass defogger and windshield wipers will increase alternator amperage output. If the alternator can’t maintain a 30-amp load, it should be replaced. See Photo 4.
Toyota recommends that the alternator fuses be tested for both voltage and resistance. According to service data, the Tundra’s charging system is supplied by four fuses: the Alt-H fuse, Alt-S fuse, MET-fuse and LH-IG fuse. According to Toyota’s wiring schematic, the Alt-H fuse connects the alternator stator with the battery. Alt-S allows the voltage regulator to sense battery voltage. The MET fuse connects the instrument panel combination meter with the IGN-2 relay. And, the LH-IG fuse supplies ignition voltage to the voltage regulator.
Due to the availability of poor-quality fuses in the aftermarket, never rely on a visual inspection to confirm the electrical integrity of the fuse. According to Toyota, the specified resistance through all four fuses should be less than 1 ohm. Key-on, battery voltage should also be available on each pin of each fuse. If you’re looking at an intermittent loss of amperage on a replacement alternator, I recommend performing a pin drag test at the fuse box by cutting one pin from an old fuse, which allows the “drag” or the fuse pin to be tested against each female connector in the fuse box.
In our hypothetical alternator comeback, it would be very easy to understand why an average diagnostic tech might overlook the possibility of a poor connection at the fuse box — especially since our 2008 Toyota Tundra charging system incorporates four separate fuses. If an amateur mechanic crammed a fuse tap or wire under a fuse leg to power an accessory, it will, without a doubt, damage the fuse box connection, which, in turn, will cause an intermittent charging complaint.