
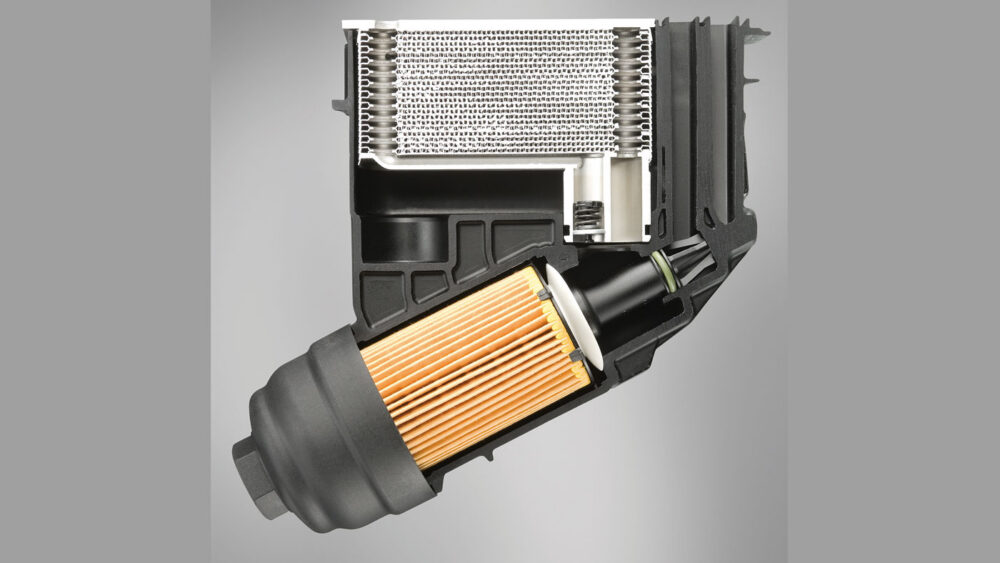
A leak at the oil filter housing isn’t limited to a gasket for its explanation. On many late-model import engines, the housing is part of a larger module that manages oil filtration and temperature, and may also contain sensors, thermostats and coolant passages.
Look at many late-model European engines and you’ll find an assembly bolted to the side of the block or mounted in the engine’s V. It may hold the oil filter and oil cooler, along with thermostats, valves or sensors. That arrangement helps fit more functions into a crowded engine compartment, but it can turn a straightforward oil leak into a more involved repair.
The design reflects two pressures on engine development: packaging and temperature control. Modern engines often use oil to operate variable valve timing systems and, in some engines, cylinder deactivation hardware. The oil must reach these components at the required pressure and volume, while staying within the engine’s operating temperature range.
Oil cooling has changed to meet those needs. Some older imports used an air-to-oil cooler mounted near the radiator, with oil routed through an adapter between the filter and its mounting base. Many later designs moved to a liquid-to-liquid cooler, often sandwiched between the engine and oil filter. Coolant warms the oil more quickly after a cold start and carries away heat once the oil is hot. Integrating the filter, cooler and related controls into a single module saves space and can simplify assembly.
How the Cooler Works
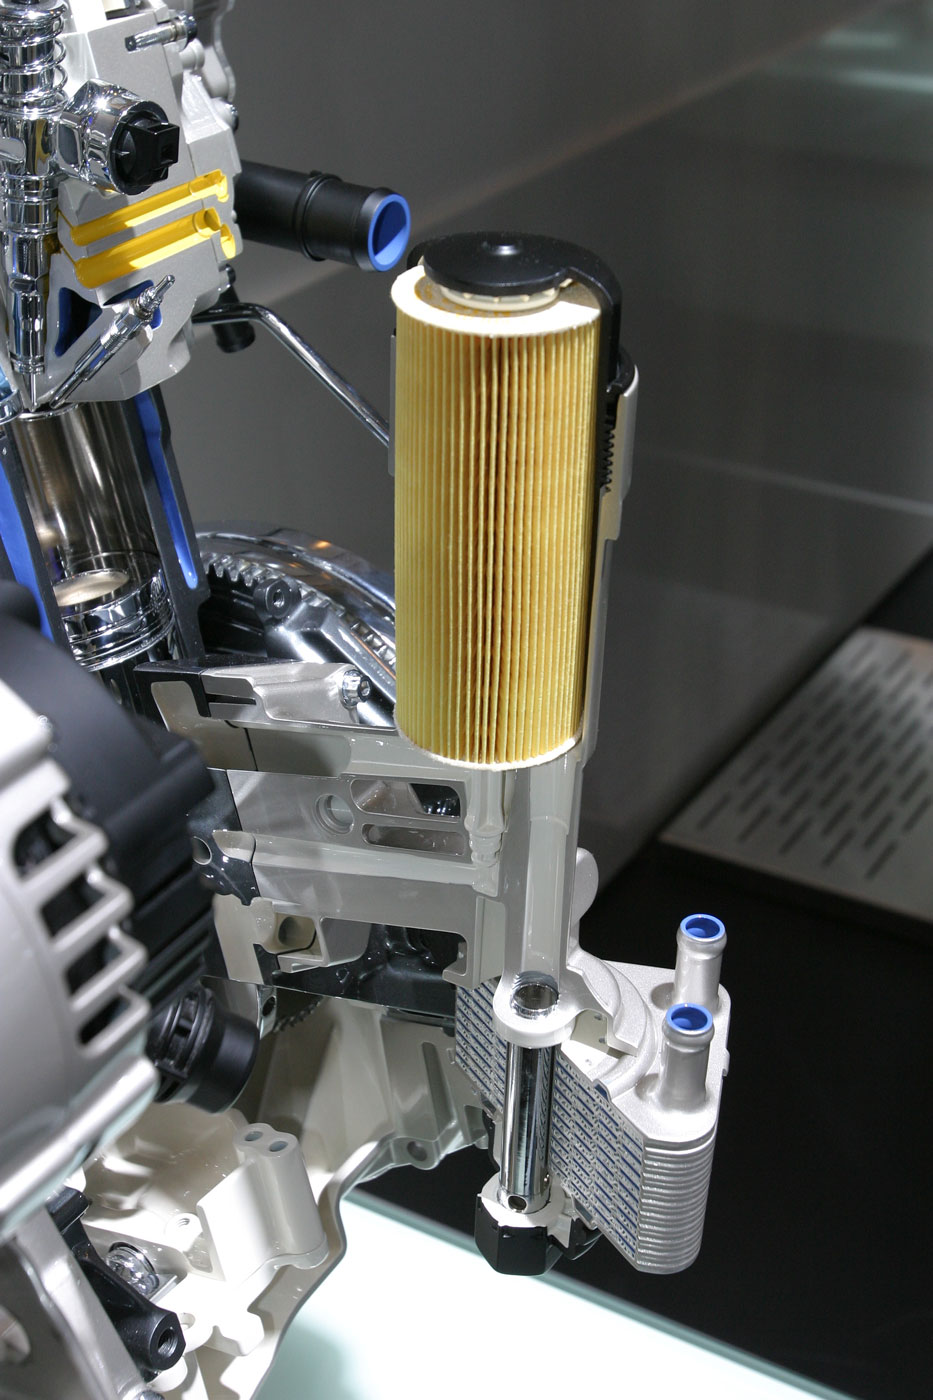
A liquid-to-liquid cooler transfers heat between engine oil and coolant through plates or passages inside a compact heat exchanger. The fluids remain separate; heat moves through the metal between them. Because coolant can carry heat away efficiently in a relatively small space, the cooler can be packaged close to the engine without the airflow requirements of a front-mounted cooler.
Many designs use stacked plates to create a large heat-transfer area. That compact construction has a service tradeoff: narrow internal passages can retain debris. If a major engine failure sends metal fragments through the lubrication system, an oil change may not remove everything lodged in the cooler. Manufacturer guidance for some engine repairs calls for replacing the cooler and related components when bearing debris contaminates the oil circuit, because cleaning cannot reliably remove all of it.
Diagnose Before Removing the Assembly
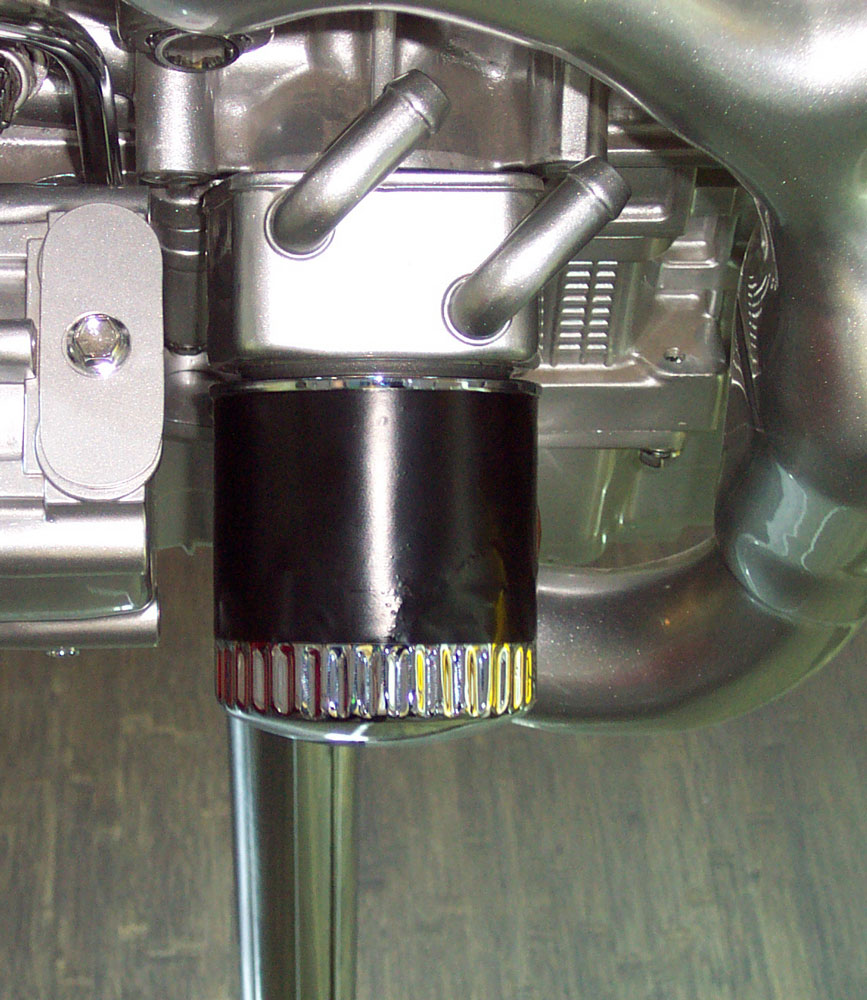
Oil around the housing does not automatically mean that the housing itself has failed. The leak may come from the housing-to-engine seal, the cooler seals, the filter cap or another component above the assembly. Oil can travel down the engine and collect at the lowest point, making the source hard to identify.
Clean the area and inspect it closely. If necessary, use an approved leak-detection dye and re-check the engine after running it. Look for coolant residue as well as oil. A leak between the oil and coolant passages can cause contamination in either direction, depending on operating pressures and the failure. If the coolant is oily or the oil appears milky, diagnose the source before deciding what to replace.
Check the vehicle-specific service information before starting. The procedure may require draining coolant, removing intake or accessory components, or following a particular sequence to release the housing. Some assemblies include separate cooler seals; others are serviced as a unit. Check whether the manufacturer specifies replacement bolts, sealants, tightening sequences or a special coolant bleeding procedure.
Careful Removal and Installation
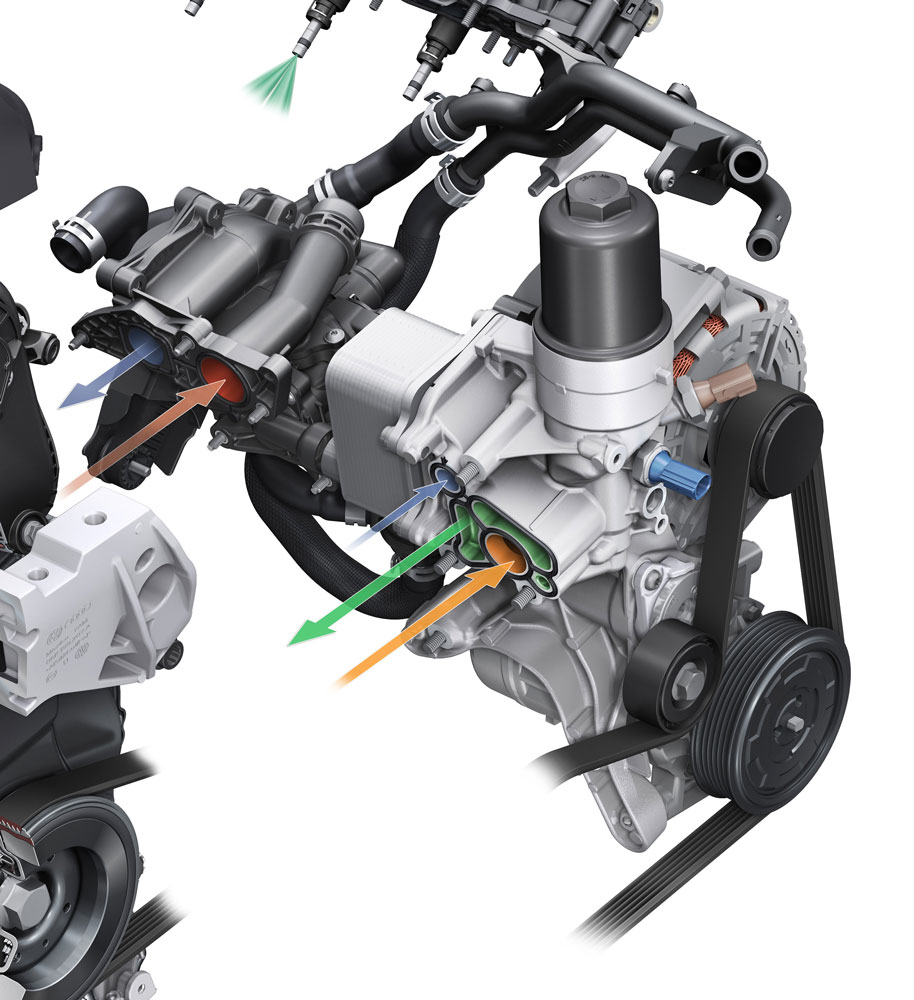
Start with a cool engine. Drain the coolant if the service procedure calls for it, then disconnect electrical connectors and coolant hoses without stressing aged plastic fittings. Clean debris from around the assembly before opening the oil and coolant passages. Dirt that falls into an exposed passage can circulate through the engine.
Remove the housing and cooler, and keep track of the location and orientation of each seal, bolt and bracket. Inspect the old parts for cracks, distortion or damage. Some original equipment housings are plastic, while others are metal. Plastic parts can become brittle over time from heat cycling and aging. Replacement choices vary by application; compare material, fit, included seals and any design updates before installing a part.
Clean the engine’s sealing surface carefully. Avoid abrasive discs and aggressive scraping that can gouge or distort the surface. Keep debris out of the oil and coolant passages. If baked-on gasket material is difficult to remove, use a compatible gasket remover and a suitable non-damaging tool. Follow product directions and keep solvent out of the engine.
Install new seals in the correct locations and orientation. Lubricate them only if the service information calls for it. Tighten fasteners in the specified sequence and to the specified torque, using a torque wrench. Remember that uneven or excessive clamping force can distort a housing, damage a cooler or cause a new leak. Avoid adding sealant unless the procedure specifies it; excess sealant can squeeze into passages.
Address Contamination and Verify the Repair
If oil has entered the cooling system, replacing the failed cooler or housing may not be enough. Oil can remain in the radiator, heater core, hoses and expansion tank. Follow the vehicle manufacturer’s cleaning procedure and use only products approved for that cooling system. A 2025 service bulletin, for example, warns against using unvalidated detergents because they may damage seals or metal components. Replace contaminated parts when the prescribed procedure calls for it.
If coolant has entered the oil, change the oil and filter after the leak is repaired, and follow the manufacturer’s guidance on whether further oil changes or inspections are needed. If the engine has suffered a mechanical failure that released metal debris, do not assume flushing will make the cooler reusable. The passages can retain contamination that may return to the engine after startup.
Refill the fluids to the correct levels, and bleed the cooling system according to the application; some vehicles require a particular sequence or electronic procedure. Start the engine and check for leaks as it warms up. Confirm that the oil and coolant levels remain stable, then re-check the housing and surrounding area after a road test and cooldown.