Saturn, the sixth planet from the Sun and the second largest in our solar system, boasts winds near its equator, that reach velocities of 1,100 miles an hour. The temperatures of Saturn’s cloud tops consistently drop down to -285° F (-176° C). I don’t think Saturn will ever become one of those trendy, futuristic vacation planets.
Speaking of vacations… In the summer of 1994, Saturn (the car manufacturer), hosted a "Homecoming" event in Spring Hill, Tennessee, which enthralled more than 44,000 loyal Saturn customers with a weekend of barbecues, plant tours, test-drives, parades and concerts.
During the trek to Spring Hill, some of the 1994 Saturn owners may have experienced an annoying air conditioning (A/C) problem. Unlike Saturn (the planet), their A/C stopped blowing cold air. And the strange thing was, when driving around town, the A/C worked fine.
This problem still plagues 1994 and newer Saturn models, equipped with an R-134a air conditioning system. The core of the problem is an A/C compressor suction set point that could be too low for some customers’ usage and driving patterns. This condition results in complete evaporator freeze-up after extended periods of highway driving.
 1. The first thing to do is confirm with the customer that their A/C system functions normally in all conditions except extended driving at highway speeds. If so, adjust the A/C compressor set point using the following procedure.
NOTE: The engine does not need to be running for the A/C compressor set point adjustment.
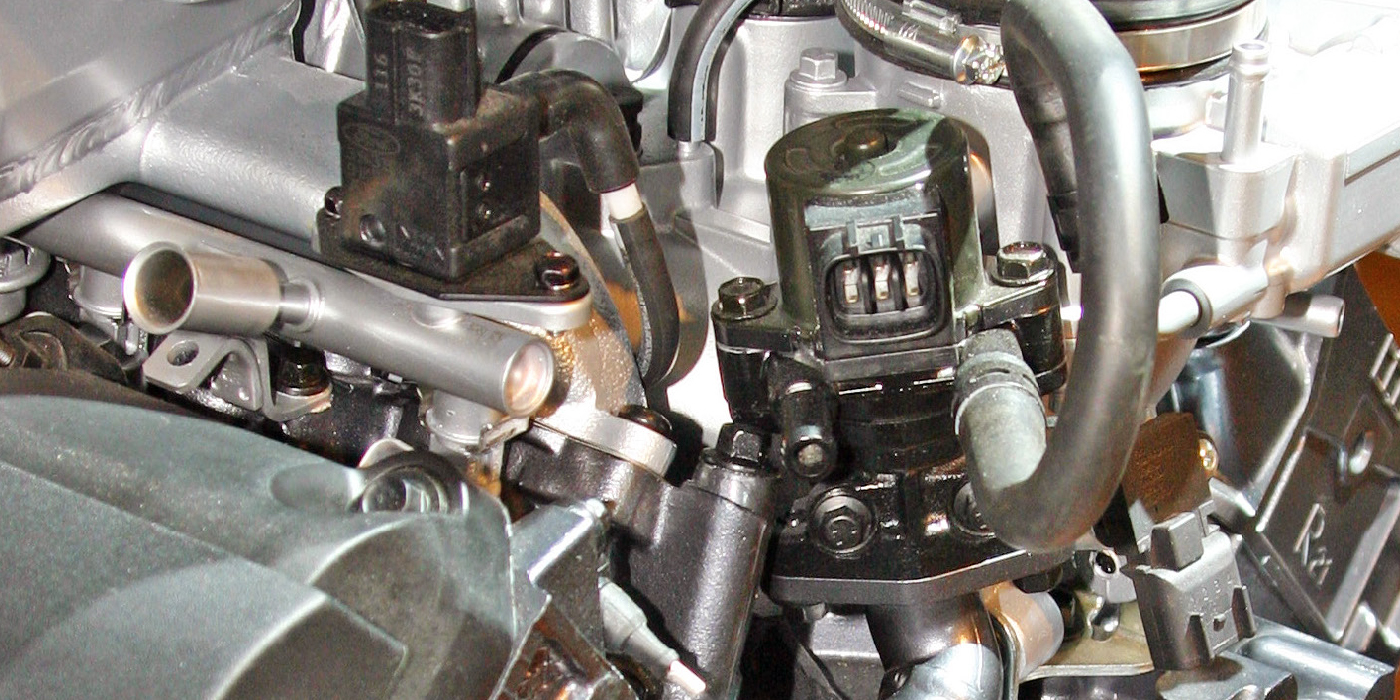
2. Locate the setscrew on the rear head of the A/C compressor.
IMPORTANT NOTE: The setscrew will be covered with either a solid silver label or a silver label with the words: "CAUTION: BE CAREFUL TO KEEP HANDS CLEAR OF THE ENGINE COOLING FAN. THE ENGINE COOLING FAN MAY OPERATE UNEXPECTEDLY." If the silver label has been broken, or an orange replacement label is present, DO NOT continue with this procedure. Additional adjustment of the setscrew could result in reduced A/C system performance at higher ambient temperatures.
 5. Using a permanent ink marker, make a mark on the A/C compressor to indicate the current position of the setscrew in relation to the compressor rear head (2).
6. Using a large blade screwdriver, turn the setscrew 1/4 turn clockwise as viewed from the rear of the compressor.
WARNING: Do not turn the setscrew on the back of the A/C compressor counterclockwise. The A/C system is under pressure, and turning the setscrew counterclockwise could cause the setscrew and/or the hot refrigerant/oil mixture to be discharged. The refrigerant/oil mixture can cause burns and/or bodily injury.
 CAUTION: Do not turn the setscrew more than 1/4 turn clockwise. Adjusting the set point changes the pressure at which the A/C compressor goes to minimum displacement. Increasing the adjustment beyond 1/4 turn clockwise will not make the system colder and could reduce A/C system performance at higher ambient temperatures.
7. Start the engine and check that the A/C system is functioning normally.
That’s all there is to it. A simple turn of the old A/C compressor set point adjustment screw, and your customer’s A/C is blowing colder than the winds of Saturn. Well, almost.
Written by ALLDATA Technical Editor, Rich Diegle. Rich is an Advanced Engine Performance Certified and ASE Master Technician with an Associate of Arts degree in automotive technology and 22 years of dealership and independent shop experience.
Courtesy of ALLDATA.
For additional information, visit www.alldata.com.