If your customer complains to you that his or her vehicles’ air conditioner blows out air that smells like the inside of old gym sneaker when the A/C is turned on, they are not alone. Literally.
The cause – microbes that getting a free ride while growing on the A/C evaporator.
Molds like damp, dark places and various bacteria can also thrive under these conditions. But besides smelling bad, these organisms can be unhealthy to breathe.
To get rid of the unwanted organisms, various chemicals can be sprayed on the evaporator directly or through the blower ducts or air intake.
Some of these chemicals are designed to be applied by DIYers. However, shops that provide A/C service can offer some of these de-smelling solutions, especially as the A/C season is starting up for many parts of the country.
The following is a service procedure to eliminate a Toyota A/C evaporator odor: A musty odor may be emitted from the air conditioning system of some vehicles that are usually operated in areas with high temperature and humidity. It’s most noticeable when the air conditioner is first turned on after the vehicle has been parked for several hours.
The odor could result from one or more of the following conditions:
1. Blockage of the evaporator housing drain pipe, resulting in a buildup of condensation.
2. Microbial growth in the evaporator, arising from dampness in the evaporator housing where the cooling airflow is dehumidified.
To address excessive air conditioning evaporator odor, check the evaporator housing drainpipe for blockage. If no problems are found, the evaporator and housing should be cleaned and disinfected using the following service procedure.
While this procedure may be used on any Toyota vehicle, specific details for the 1997-and-older SXV/VCV10 Camry follow.
CAUTION: Wear safety glasses, protective mask and gloves while working with the freshener.
Service Procedure:
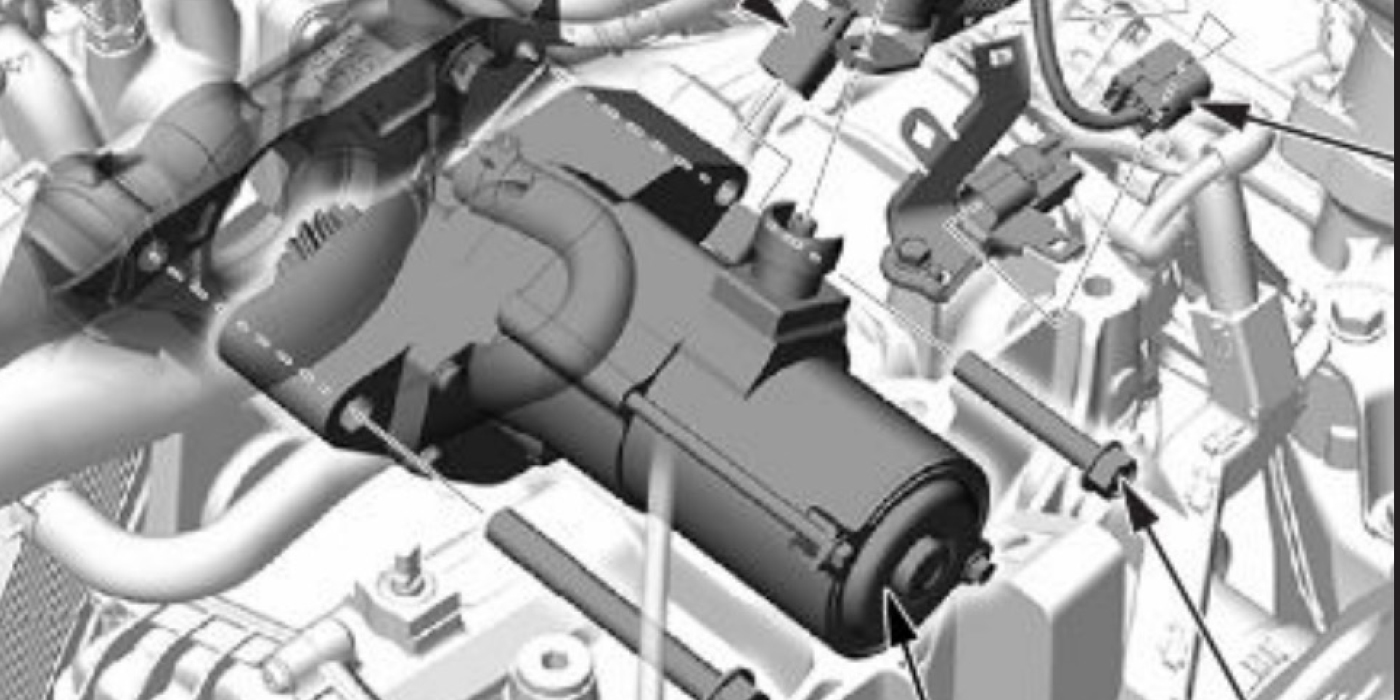
1. Parts removal.
b. Remove the plate on the side of the heater unit using steps (1) and (2), indicated with bigger arrows to show direction in Figure 2.
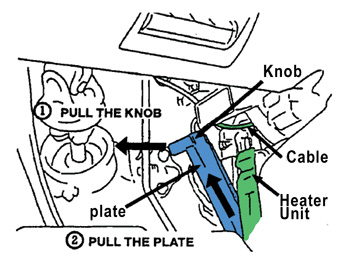
Caution: Do not bend the cable; the plate will be reused.
c. Remove the blower resistor.
2. To clean the evaporator, follow the general procedures at the beginning of this bulletin. Also see Figure 3.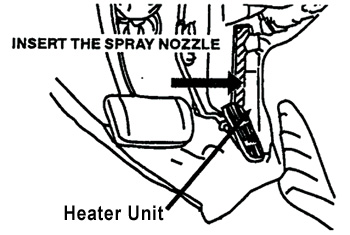
3. Parts reinstallation.
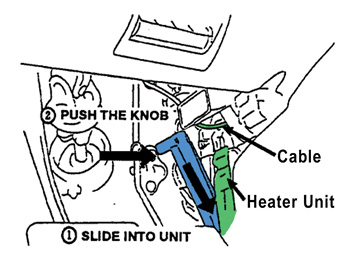
Caution: Confirm that the plate is secure.
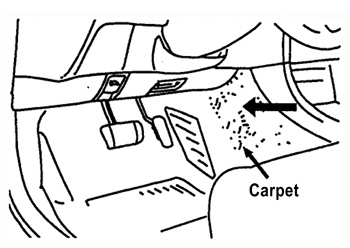
b. Restore the carpet to its original position, taking care not to bend the cable.
Courtesy of ALLDATA.
For additional information, visit www.alldata.com.