By Rich Diegle
ALLDATA Senior Automotive Editor
Noises can sometimes be very difficult to diagnose — especially under the hood and only when the vehicle is in motion. In the case of some 2003 Dodge Ram 1500 2WD pickups equipped with 4.7L and 3.7L V8 engines, a growling or moaning sound may only be heard during heavy acceleration when carrying substantial loads or towing.
This condition may be cause by the right motor mount contacting the motor mount frame bracket. The noise can be eliminated by installing a rubber isolator between the motor mount and the motor mount bracket.
Diagnosis
Inspect the right engine mount and bracket. If the motor mount is contacting the bracket, there will be witness marks (shiny metal) present on the frame bracket. Perform the Repair Procedure if the witness marks are present.
Repair Procedure
1. Raise the vehicle on a hoist.
2. Place an adjustable jack stand under the engine to support the engine when the motor mount through-bolts are removed.
3. Loosen both motor mount through-bolts. Leave the nut on the left side mount as this bolt will not be removed. Remove the nut on the right side.
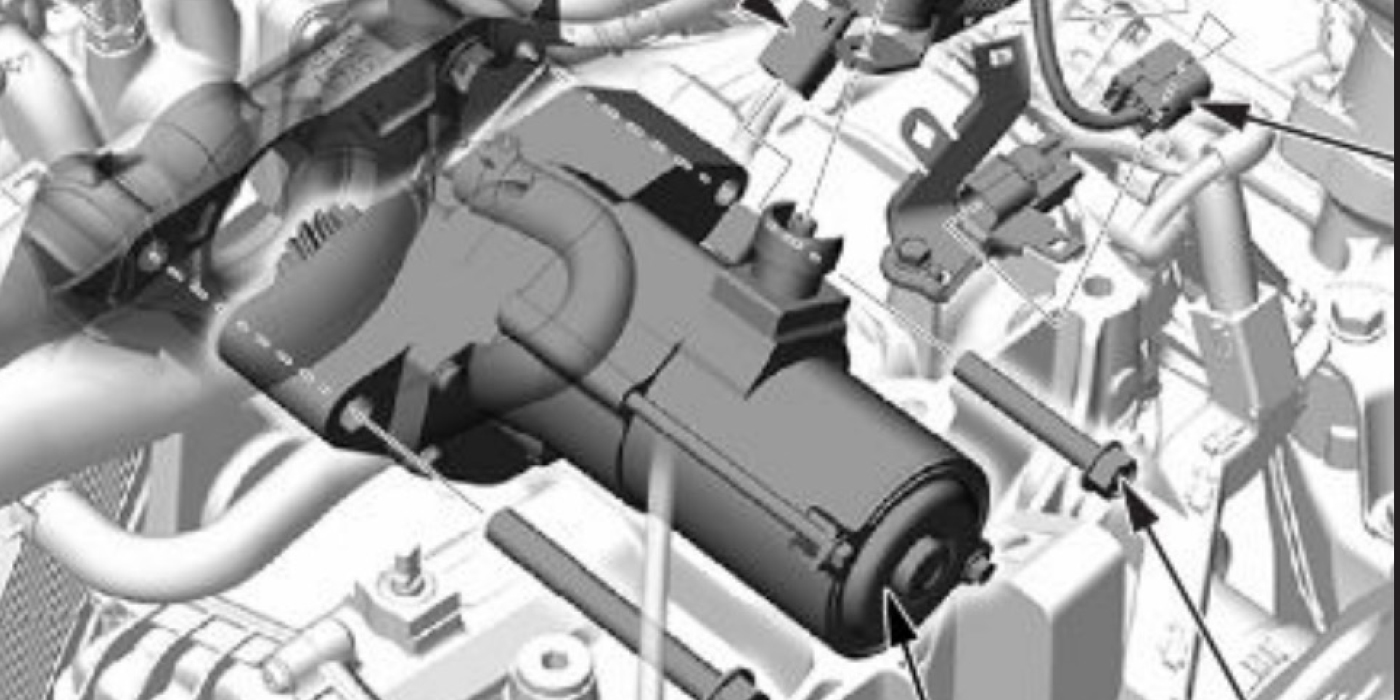
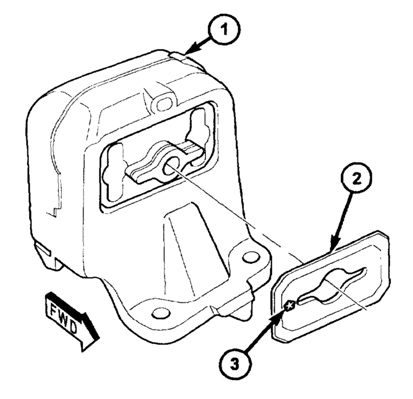 4. Raise the engine with the jack stand until the right side through-bolt becomes free. Remove the right side bolt. Raise the engine far enough to clear the frame bracket and allow the isolator pad, (Chrysler P/N 55366020AA) to be inserted.
Insert the isolator on the mount with the Pentastar logo facing the front of the vehicle (see Figure 1).
5. Lower the bracket and align the mount with the frame bracket and push the bolt through the isolator and bracket with the threads at the rear.
6. Install the nut and tighten both through bolts to 115 Nm (85 ft.-lbs.).
7. Remove the jack stand and lower the vehicle.
Written by ALLDATA Senior Automotive Editor, Rich Diegle, an Advanced Engine Performance Certified, ASE Master Technician with an AA Degree in automotive technology and 23 years of dealership and independent shop experience.
Courtesy of ALLDATA.
For additional information on ALLDATA, visit www.alldata.com.