Mercedes Models
2012-2017 C-Class, CLS-Class, E-Class, GL-Class, GLC-Class, GLE-Class, GLK-Class, GLS-Class, M-Class, and S-Class vehicles (166, 204, 205, 207, 212, 213, 217,218, 222, 253, 292 platforms)
Mercedes-Benz AG (“MBAG”), the manufacturer of Mercedes-Benz vehicles, has determined that on certain Model Year (“MY”) 12-17 C-Class, CLS-Class, E-Class, GL-Class, GLC-Class, GLE-Class, GLK-Class, GLS-Class, M-Class, and S-Class vehicles (205, 218, 207, 212, 213, 166, 253, 292, 204, 217, 222 platforms) that are driven for extended periods of time in salt-belt states and that are operated in high-corrosion environments with exposure to road salt may experience varying levels of corrosion on specific bolts that are used on the power steering rack. This corrosion, along with certain weighted driving loads, could result in the fracturing of these bolts. This campaign affects approximately 418,851 vehicles.
The work procedures vary slightly for certain platforms, they will all be outlined below:
Work procedure for 204, 207, 212, 217, 218, and 222 platforms:
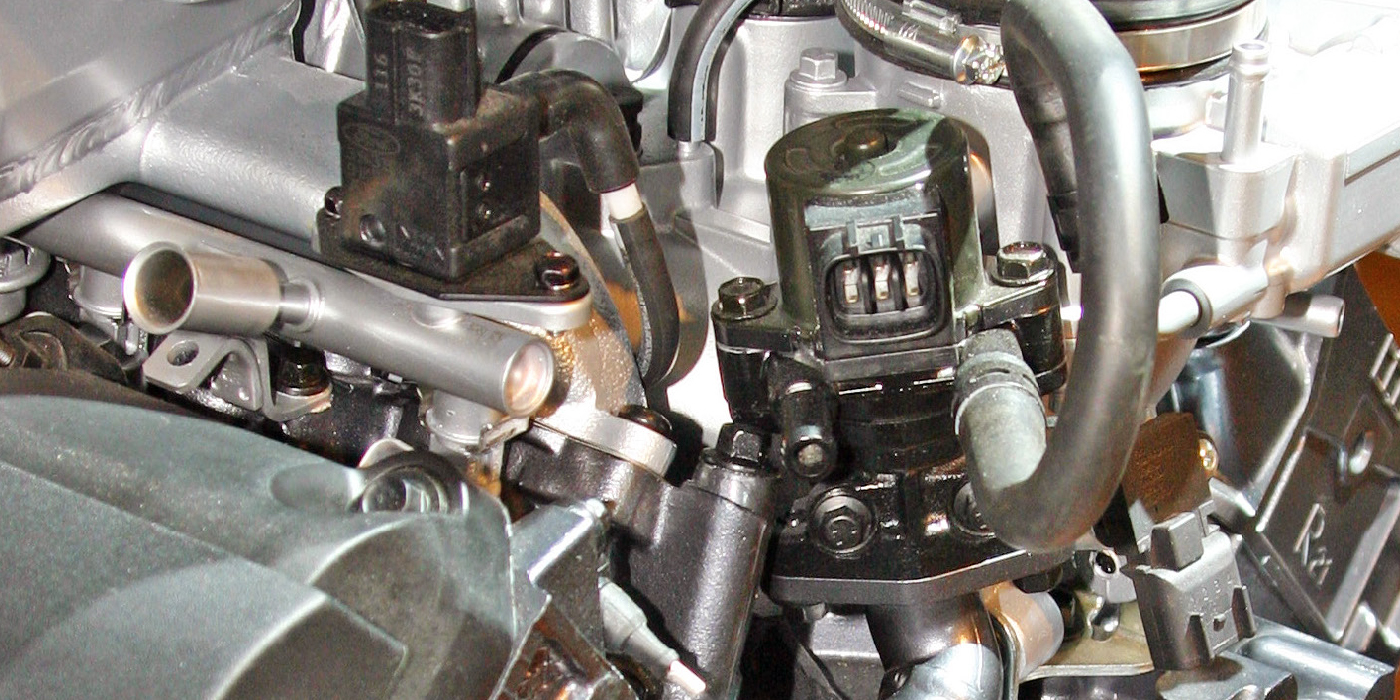
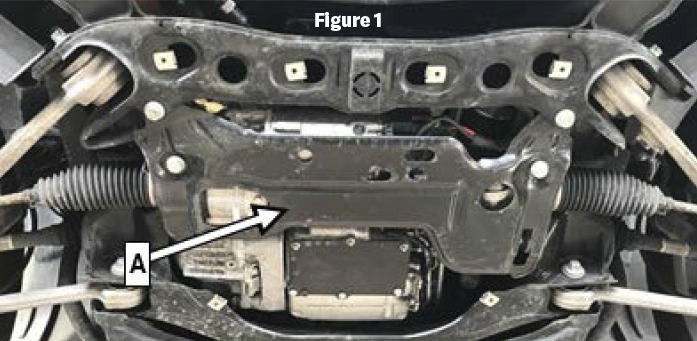
1. Remove the center section of the lower engine compartment lining. Remove the mounting plate (A, Figure 1) for the steering gear. Please note that bolt N910105012013 referenced in AR46.20-P-0600EL is NOT a one-time use bolt and may be reused.
2. Slightly release the steering gear and secure it from falling down with a transmission jack. Remove screws (B and C, Figure 2), making absolutely sure to do so individually and one after the other. Replace them w/new steel screws and tighten to 5 Nm + 90° turn.
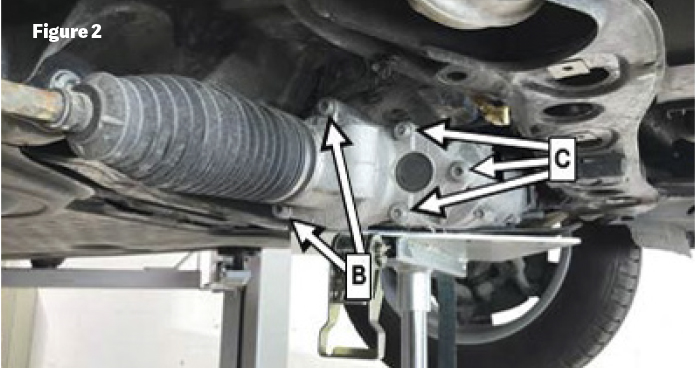
• The procedure must be completed so that the power-pack does not twist away from its set position, resulting in consequential damage. If a screw should break off or have already broken off, the electric power steering rack must be replaced.
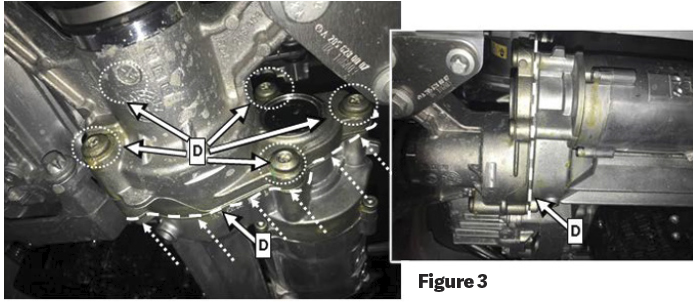
3. After replacing the screws, apply a generous coat of wax to the area (D, Figure 3) around the screw heads, screw ends, and the gap between the power-pack and the steering.
4. Assemble in reverse order. Perform wheel alignment check and carry out toe adjustment. Reset the learned values for the electric power steering with a scan tool.
Work procedure for 205, 213, 238, and 253 platforms:
1. Remove the center section of the lower engine compartment lining.
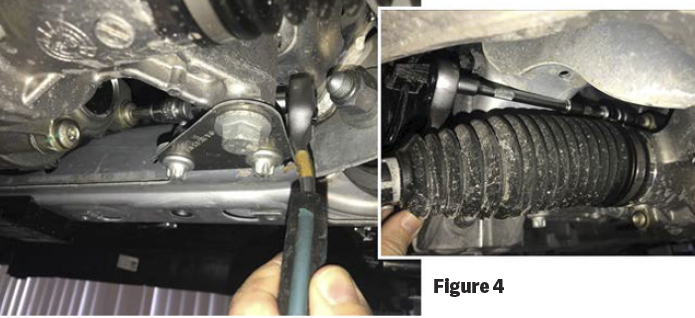
2. For models 205, 213, 238, and 253, the steering does not have to be released from the front axle carrier. Remove screws (B and C, Figure 2, also shown in Figure 4), making absolutely sure to do so individually and one after the other. Replace them w/new steel screws and tighten to 5 Nm + 90° turn.
• The procedure must be completed so that the power-pack does not twist away from its set position, resulting in consequential damage. If a screw should break off or have already broken off, the electric power steering rack must be replaced.
3. After replacing the screws, apply a generous coat of wax to the area (D, Figure 3) around the screw heads, screw ends, and the gap between the power-pack and the steering.
4. Assemble in reverse order.
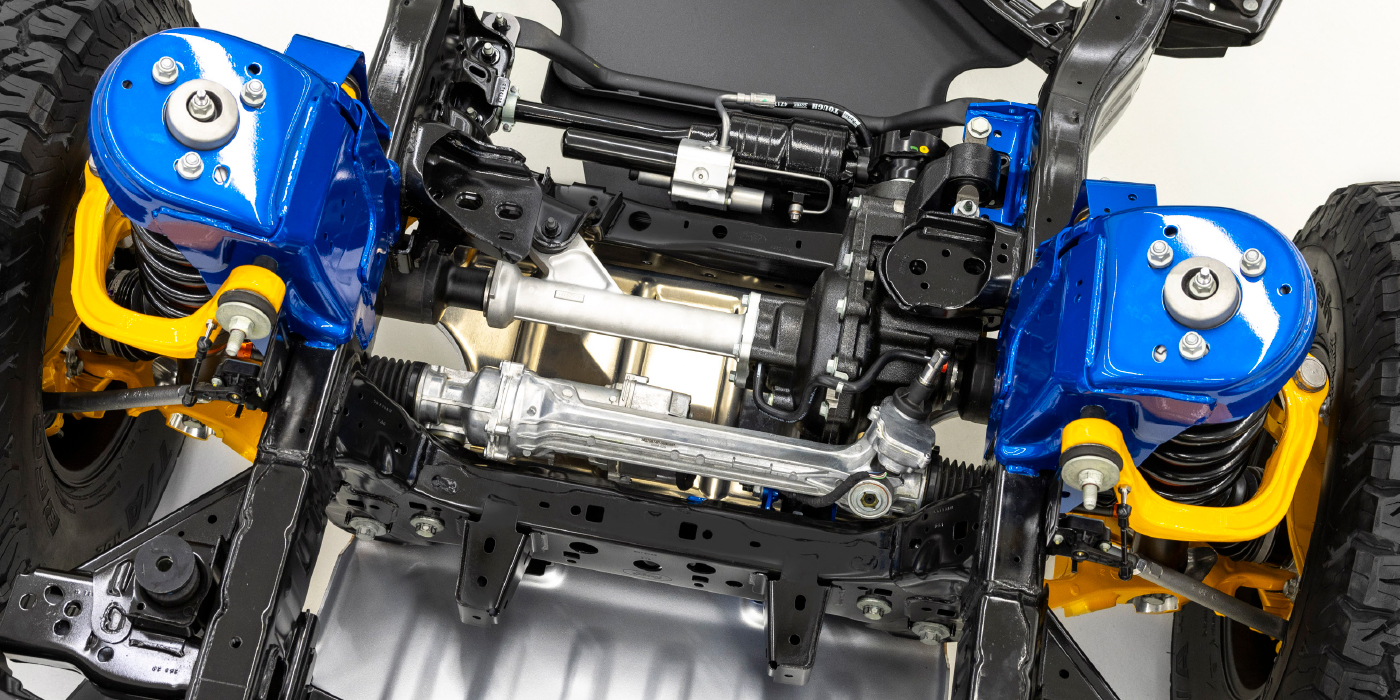
Work procedure for 166 and 292 platforms:
1. Remove the center section of the lower engine compartment lining.
2. Remove the screws (E, Figure 5) which connect the front axle differential to the front axle carrier. The front axle differential will remain lying in front axle carrier, it only needs to be lowered slightly. No further threaded connections are released at front axle differential.

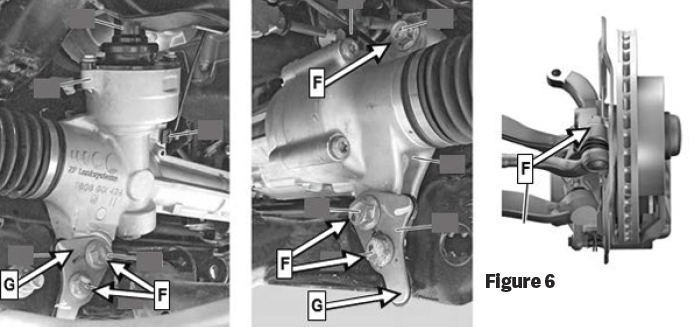
2. Unscrew the steering gear from the front axle carrier, release the tie rods from the steering knuckles (F, Figure 6). The steering coupling to the steering column does NOT need to be released, and no further threaded connections need to be released. Remove the retaining plates (G, Figure 6).
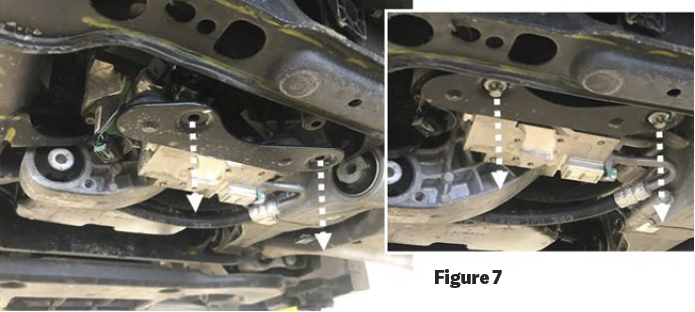
3. For vehicles with code 468 (Active Curve System), unscrew the hydraulics block (Figure 7) and slightly press downwards with lines connected.
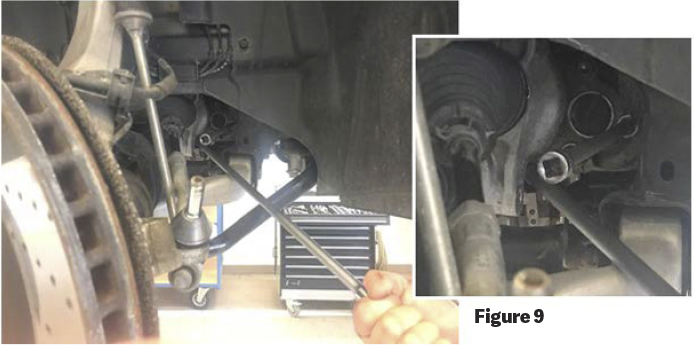
4. Slightly lift the steering gear on the left and right, then move it rearward in the front axle carrier so that the screws (B and C, Figure 8) are accessible. Keep the steering gear pressed rearward with the aid of a helper as shown (Figure 9).
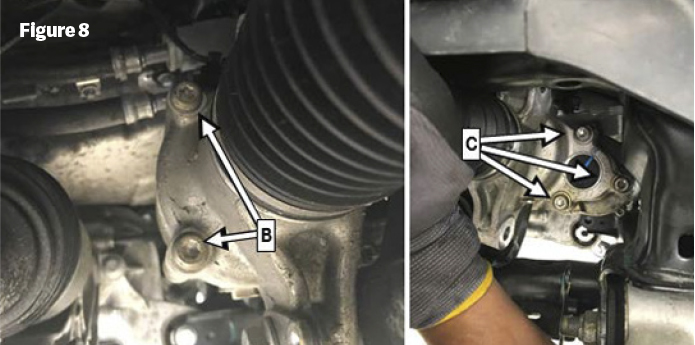
5. Remove screws (B and C, Figure 8), making absolutely sure to do so individually and one after the other. Replace them w/new steel screws and tighten to 5 Nm + 90° turn.
• The procedure must be completed so that the power-pack does not twist away from its set position, resulting in consequential damage. Take into account the different screw lengths of screws B and C in models 166 and 292! If a screw should break off or have already broken off, the electric power steering rack must be replaced.
6. After replacing the screws, apply a generous coat of wax to the area around the screw heads, screw ends, and the gap between the power-pack and the steering.
7. Assemble in reverse order. Perform wheel alignment check and carry out toe adjustment. Reset the learned values for the electric power steering with a scan tool.