VIDEO: Ignition Coil Torque

VIDEO: Ignition Coil Torque

Don’t let improper torquing of the bolt ruin the job. This video is sponsored by Standard Motor Products.


CC:
When was the last time you took the time to torque down an ignition coil? Most coils attach to the valve cover with just one bolt. It is typically a M6 bolt that can be removed with a 10mm socket, or in the case of this Honda, an Allen socket. You might think that it would a job to tighten this bolt just using feel, but you could damage the coil and create a misfire.

Always apply the specified torque to the mounting thru-bolt for the coil. The specification can be found in the service information.  This Honda requires 12Nm or 8.7 lbft of torque to properly fasten it to the valve cover.

Loose thru-bolts could lead to failures under vibration and cause a poor ground connection.

Over tightened bolts could lead to a cracked coil mounting ear and/or premature thru-bolt failure. Also, you can damage the threads on the valve cover if you are not careful.

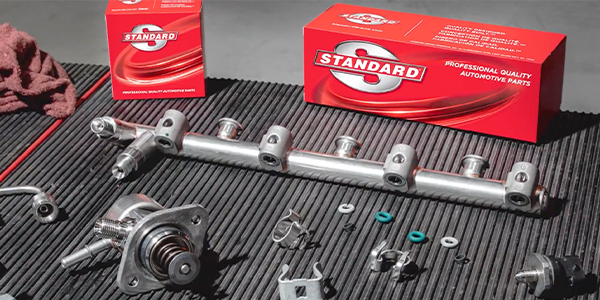
The specifications for the bolt are light and in many cases will be in inch pounds and will require a ¼ torque wrench. Never guess with these bolts. When you’re installing a premium coil such as this Blue Streak Import Coil, your customer is expecting a premium job.  Don’t let something as simple as improper torquing of the bolt ruin the job.  You could end up damaging a new ignition coil. Also, it could lead to a diagnostic nightmare. Do the job right, and torque to coil down properly.

This video is sponsored by Standard Motor Products.

You May Also Like

Wheel Bearing Shortcuts

When you’re installing a wheel speed sensor on a hub unit, never ever remove it from the original unit. Sponsored by Auto Value and Bumper to Bumper.

Hey, I got a great shortcut for you. If you're working on wheel hubs, if you have one where you're dealing with a harness for the wheel speed sensor that may be behind a fender liner, has all these horrible Christmas trees on it to get in and out from behind areas that you've never seen, well, you can just simply take the old out and then put it in the new and get rid of the new harness. Do not ever use the shortcut. It is a bad thing to do because you are destroying the calibrated air gap that was done at the factory, and this is very precise, done with computers. By removing the wheel speed sensor from one and putting it in another, you've just changed everything completely and you're gonna cause yourself a comeback. Do you wanna know why? Well, it's gonna cause an erratic wheel speed sensor code or issues with the air gap.

Maverick Tire Changer: Handling Large Custom Wheels

Large, custom 4×4 wheels are all the rage, and Hunter’s Maverick tire changer makes handling them a breeze.

Introduction to the Maverick Tire Changer

Joe Keene speaks with Hunter Engineering service rep Rick Marzen on Hunter’s premium center-clamp Maverick tire changer.

Schaeffler and Sustainability with Jerry Conroy

Conroy shares insights into his career trajectory, the evolving landscape of the company’s aftermarket operations, and its commitment to innovation and sustainability.

Flushing the Brake Fluid is Critical on Every Brake Repair

Making sure the brake fluid is the correct quality is critical. Sponsored by Auto Value and Bumper to Bumper.

Other Posts

Selecting the Right Oil for your Customers Engine

Learn how to educate customers on the importance of OEM specifications and premium lubrication for their vehicles’ maintenance needs.

At the Intersection of Tradition and Innovation with Grace Hovis

Grace Hovis’s journey in Hovis Auto & Truck Supply blends tradition with digital innovation in the automotive aftermarket industry.

Turbocharger Maintenance ft. Rein TechSelect Turbo Kits

Learn about common challenges with turbocharger maintenance and how Rein TechSelect Turbo Kitsmake the repair process easier for technicians.

The Standard® Advantage

Standard® knows that what comes out of a repair is directly dependent upon what goes into the box. This video is sponsored by Standard®.