Models affected:
1998-2002 Chevrolet Camaro, Corvette
 1998-2002 Pontiac Firebird with 5.7L Engine (VIN G – RPO LS1)
1999-2002 Chevrolet Silverado, Suburban, Tahoe
2002 Chevrolet Avalanche
1999-2002 GMC Sierra, Yukon, Yukon XL
2002 Cadillac Escalade, Escalade EXT with 4.8L, 5.3L or 6.0L Engine (VINs V, T, Z, N, U – RPOS LR4, LM7, L59, L09, L04)
Some customers may comment on a mild to severe engine ping (commonly referred to as spark knock), usually worse during acceleration, and/or an illuminated MIL. Upon investigation, the technician may find DTC P0332 set.
This condition may be the result of corrosion of the rear bank knock sensor due to water intrusion into the sensor cavity.
This condition is more apparent on vehicles in which customers frequently wash the engine compartment.
Replace the rear bank knock sensor (P/N 10456603) and build a dam (wall) around the sensor using RTV to divert water away from the sensor. Use the procedure and part number listed.
1. Remove the intake manifold. Refer to the Intake Manifold Replacement procedure in the Engine Controls sub-section of the appropriate service manual. 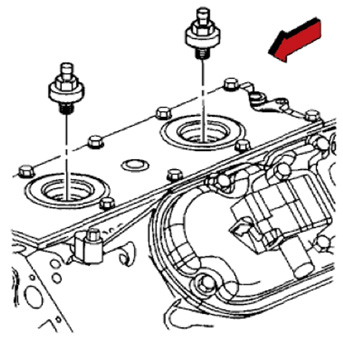
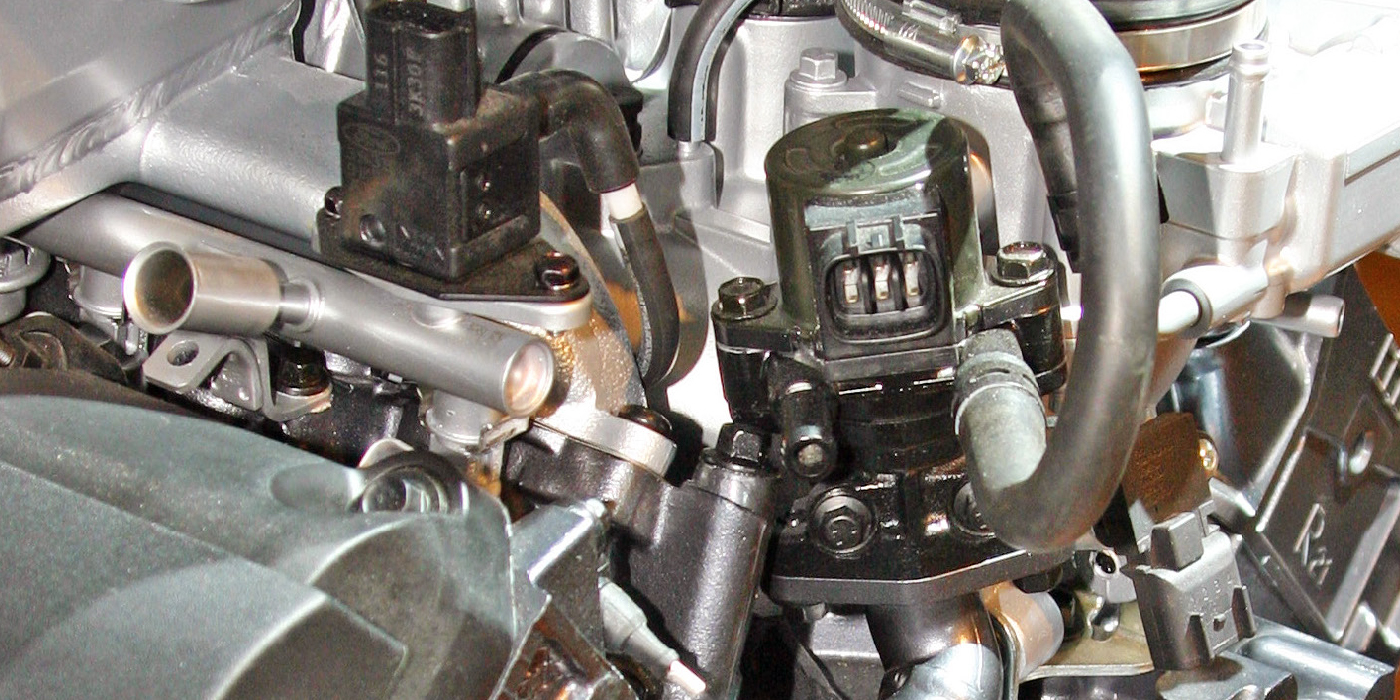
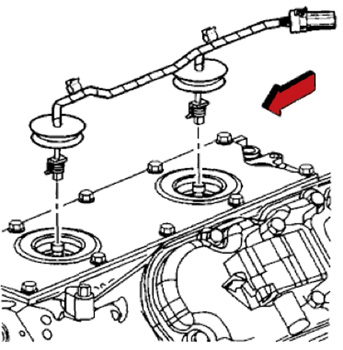
2. Remove the wiring harness assembly from the knock sensor.
See Figure 1.
3. Remove the rear bank knock sensor.
See Figure 2.
4. Install the new rear bank knock sensor. Tighten the knock sensor to 20 Nm (15 lb.-ft.).
5. Install the wiring harness assembly to the knock sensor.
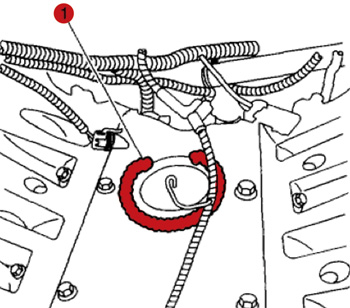
6. Apply a bead of RTV silicone sealant approximately 9 mm (3/8”) wide and 6 mm (1/4”) high along the outside edge of the ridge on the engine block valley cover around the rear bank knock sensor. DO NOT form a complete circle. Leave the rear section open as shown in Figure 3.
7. From the underside of the intake manifold, completely remove the rear intake manifold seal (foam material).
 8. Install the intake manifold. Refer to the Intake Manifold Replacement procedure in the Engine Controls sub-section of the appropriate service manual.
Technical service bulletin courtesy of Mitchell 1.
For more information on Mitchell 1 products and services, automotive professionals can log onto the company’s website at www.mitchell1.com.

