This bulletin provides information related to Sorento models produced from June 30, 2002 to October 3, 2004, and describes the proper service procedure for identifying and replacing the coolant reservoir tank. The new improved coolant tank allows some expansion and contraction found in many pressurized cooling systems.
Parts Information:
Part Name Previous Part Number New Part Number
Coolant Reservoir Tank 25430 3E200 25430 3E200QQK
Note: The previous design is ribbed; the new design is reinforced. Verify that the reservoir has not been previously replaced by reaching underneath and checking the lower surface of the reservoir.
Effective Vehicle Information:
2003-’05 Sorento vehicles produced from June 30, 2002 to October 3, 2004.
Repair Procedure:
1. Raise the hood and locate the coolant reservoir, cover the cap with a cotton shop towel and slowly remove the reservoir tank cap.
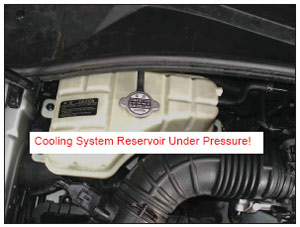
Warning: Engine coolant is flammable at certain temperatures. If coolant is spilled during the service procedure, all residual coolant must be removed from all surfaces before releasing the vehicle back to the customer. Make sure that the engine has cooled down to outside temperature before starting the repair to avoid being burned by hot coolant.
2. Use a suction pump to remove the coolant or install a rubber plug or equivalent to prevent the coolant from leaking completely out of coolant reservoir tank when the hoses are removed.
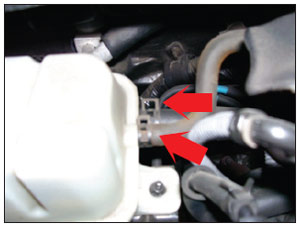
a) Remove the two hose clamps and hoses from the coolant reservoir tank.
b) Transfer the overflow hose from the old to the new tank.
3. Remove the three retaining nuts holding the coolant reservoir tank.
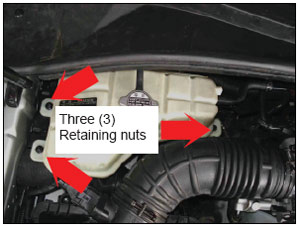
a) Drain the remaining coolant into the transfer container.
b) Install the new replacement tank to the vehicle, tighten retaining nuts to 84-108 in.-lbs. (9.4-12.2 Nm).
c) Connect the rubber hoses and clamps as removed.
d) Fill the coolant reservoir to the correct level, install pressure cap. Coolant should be a 50/50 mixture unless otherwise specified on container.
Courtesy of Kia Motors America, Inc.

