The ball and socket joint has been around on animals and humans for millennia. This simple design has been used on vehicles since the turn of the century because it works. But, just like our hip joints, ball and socket joints, like ball joints, tie rods and sway bar links, wear out.
If you went to the doctor and in the examination he pulled out a pry bar and a large set of pliers, you might get a little scared and fear that his diagnosis might be more damaging than the actual problem. The same is true for ball joints and tie rods. Any OEM- or suspension manufacturer-recommended procedure for inspecting a ball-type joint rarely involves a pry bar and almost never involves a set of pliers. Just like a doctor, you must use your hands and eyes.
BALL JOINTS
Unlike a rubber bushing, a spherical ball joint is designed to pivot through multiple planes. Of course, because the ball joint constantly pivots at different angles, it tends to wear more rapidly than do bushings.
Ball joints can be broken down into the load-bearing and non-load (follower) bearing categories. A load-bearing ball joint is designed to support the weight of the vehicle while providing a hinge point for the steering system. Most load-bearing ball joints are designed to cancel the effects of normal wear by centering themselves in their own sockets.
Non-load-bearing ball joints or follower style, on the other hand, are designed to maintain precise dimensional tolerances in a steering or suspension system. Wear in a non-load-bearing ball joint will cause a noticeable change in the camber, caster or toe angle of a front suspension. Consequently, non-load-bearing joints are preloaded in order to compensate for wear. Unloaded control arm ball joints, for example, should be tested for preload when the suspension system is disassembled.
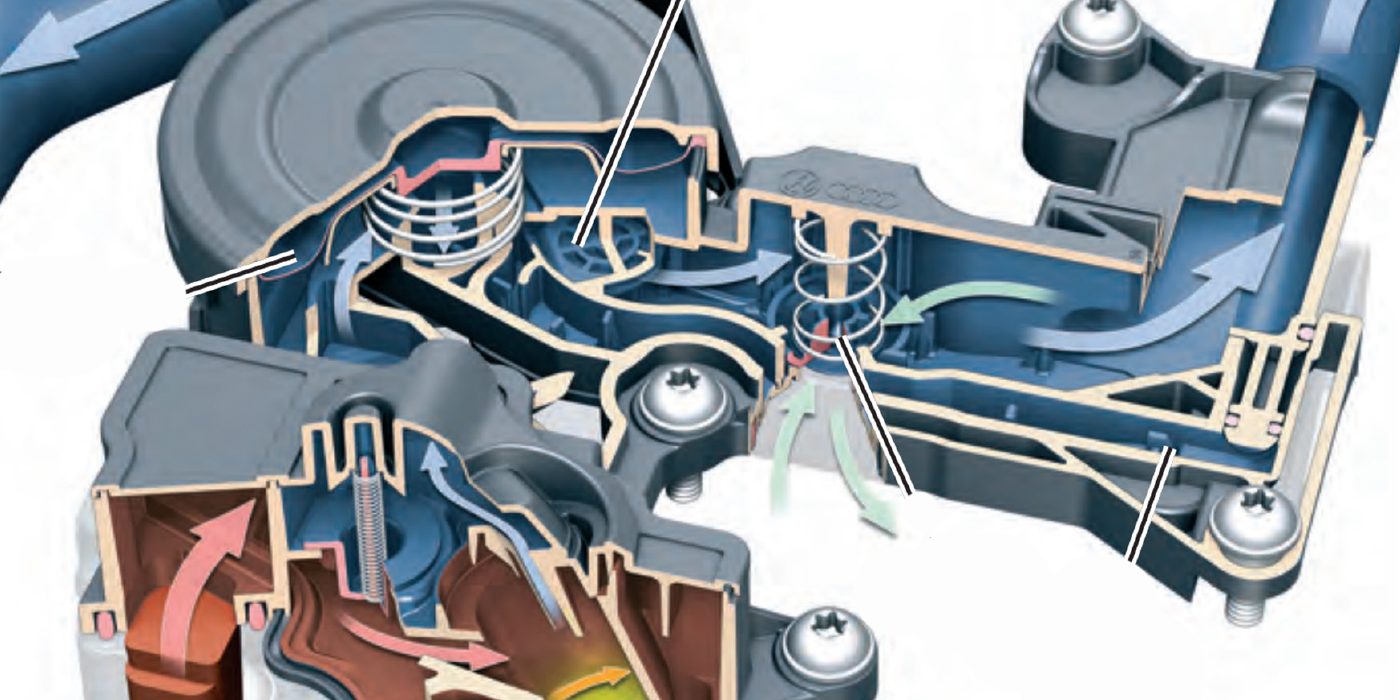
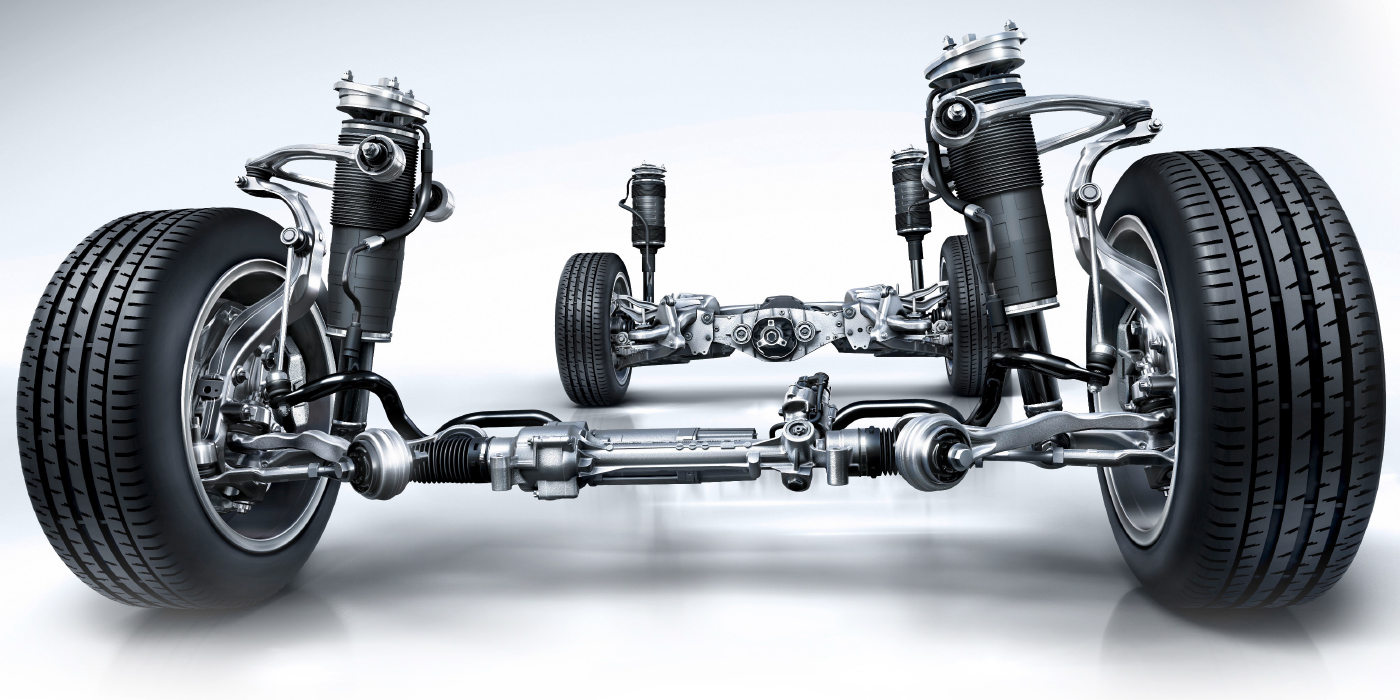
A ball joint is made up of a housing, ball stud, bearings, end cover and Belleville washer or spring. A Belleville washer is a conical-shaped spring designed to be loaded in the axial direction. The joint is attached to a control arm by pressing the joint into the arm or riveting the joint to the arm. If the joint is pressed into the arm, it will require a special tool to remove the old joint and install the new one. Failed pressed joints can be difficult to remove because of corrosion between the control arm and joint. This is especially true where a steel ball joint housing is pressed into an aluminum control arm. When the joint is riveted to the control arm, the rivets are drilled out or cut with a air chisel. The new joint is replaced using bolts and locking nuts.
Tie rod end ball joints, on the other hand, are more tolerant of wear. Providing an assistant is available to turn the steering wheel of the vehicle in a parked position, the “dry-park” testing method will indicate excessive wear in most tie rod ends.
Inner tie rod ends found on steering racks should be tested for excess wear by listening for a knocking or clicking noise as the steering is turned. Whatever the method used, remember that small amounts of wear in each tie rod end can add up to a major variation in toe angle.
Technicians often have a problem locating valid specifications for ball joint testing. In many cases, a vehicle manufacturer’s warranty tolerances are simply too liberal for real-world alignment situations. In other cases, a manufacturer simply leaves the issue to the technician’s individual judgment. This allows for the real-world effects that cumulative bushing and ball joint wear will have on the steering and suspension system as a whole.
If you use a pry bar and brute strength, your inspection could be influenced by the bushings in the control arms. If you use a set of “water pump pliers” to compress a tie rod, it will give you a false reading almost every time and is not a measure of wear for some types of tie rods; even some new tie rods will compress.
It may look dramatic to the customer, but it could get you in a load of trouble. Many disreputable shops have used this technique to increase sales and many repair shop regulators disapprove of this method. Ford and other OEMs recommend technicians use their hands to pull and push on tie rods to feel for play.
BALL JOINT INSPECTION
Some ball joints that have a grease fitting use the fitting as a wear indicator. If a grease gun will not couple to the fitting, the joint needs to be replaced. As the joint wears, the Belleville washer or spring maintains the tension on the bearings to maintain zero axial endplay as the control arms move. Lateral wear causes the ball stud to move inside the bearing. It can affect camber and tire wear. The Belleville washer or spring will not compensate for lateral wear.
INSPECTION
Loaded Joint: To check a loaded ball joint, place a jack or jack stand under the lower control arm to support the weight of the vehicle. Attach a dial indicator to the lower control arm and locate the dial in a vertical position to measure axial runout at the steering knuckle. In the case of an all-wheel-drive front ride strut or independent RWD, it may be necessary to mount the dial at the CV joint. Moving the steering knuckle can check lateral runout.
For a SLA suspension that has the coil spring over the top arm, the upper joint is loaded. To check the joint, the upper control arm is supported to unload the joint. If the ball joint has a built-in wear indicator, joint play should be checked while the vehicle is on its wheels.
Follower Joint: To check a follower-type joint, the Belleville washer or spring is loaded or compressed to check for axial end play. For a strut-type suspension, place a jack stand under the cradle to allow the strut to fully extend. Attach the dial indicator clamp to the lower control arm and locate the dial in a vertical position to measure axial runout at the steering knuckle. Place a jack under the ball joint and load the joint by raising the jack. Turn the steering wheel and observe the ball joint to check lateral runout.
For a SLA suspension, the upper control arm can be blocked and the joint can be compressed. Attach a dial indicator to the steering knuckle and place in a vertical or parallel position to measure axial runout at the lower control arm. Moving the steering knuckle can check lateral runout.
There are specifications for alignment, ride height and ball joint end play.
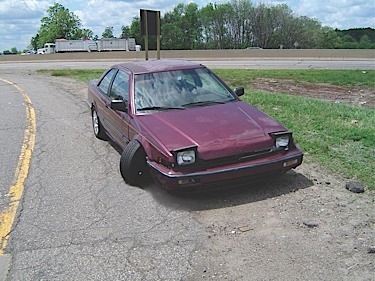
The overall condition of the chassis is important to the safety and performance of the vehicle. In the area of safety, it is a good practice to cover your assets. Try to convince the owner of the vehicle that it is important to correct all of the conditions that could cause the vehicle not to perform safely. If this is not possible, make sure that all conditions not repaired that affect safety are made a part of the repair order and a disclaimer is attached.
Tie Rod Inspection By The Number
1. Check the outer tie rod ends by grasping BY HAND and push up and down. DO NOT USE A PRY BAR. Check the inner tie rod ends, pushing them front to rear. If any free play is observed in a joint, it is worn and should be replaced. Keep reading for additional Ford and Lincoln tie rod inspection tips.
2. While vehicle is on the ground or on a drive-on hoist, have an assistant rotate the steering wheel rapidly back and forth from 10 o’clock to 10 o’clock while observing the inner and outer tie rods. If the outer tie rod ends have any vertical movement or the inner tie rod ends have any horizontal movement, the tie rod end with the observed movement should be replaced.
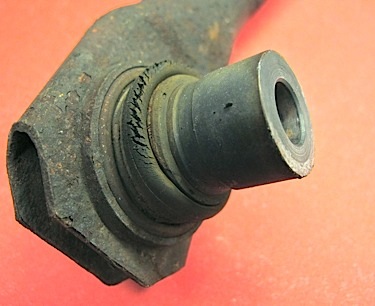
3. Raise the vehicle and remove the front wheels. The wheels will need to be turned to the right in order to inspect the passenger-side inner tie rod end and to the left to inspect the driver’s-side inner tie rod end. Inspect all four seals for tears, perforations and wear. If there is any indication of wear or perforations on the seal, that tie rod end should be replaced.
4. Stud Corrosion: Using a putty knife or other hard, flat, dull object, lift the bottom of the seal up, exposing the stud. If any water escapes from the seal in the form of bubbles or in a liquid form, that tie rod end should be replaced. Closely examine the stud for signs of corrosion, especially around the knuckle. A rag might be needed to clean off any grease on the stud that impairs a good visual inspection. If there is any sign of corrosion, that tie rod end should be replaced.
If you find play at the inner tie rod, confirm that it’s the joint, and not the rack bushings, that are worn. If the rack boot allows it, squeeze the boot to feel that the joint is the problem and the rack isn’t loose and moving in the housing. This will also give you an indication if the rack boot needs to be replaced. It’s always a good practice to replace the boot, but you may find it’s easier to obtain a tie rod end rather than a direct-fit boot. Some of the universals fit well, but if you have to order the tie rod end, add the boot kit to the order.
With outer joints, it’s a good practice to make note of the length of the rod before the end is removed to get the toe in the ballpark on reassembly; many techs simply count the turns when the rod is removed, but a measurement from the center of the joint to a known point is a good back up. Either way, be sure the toe is within specs before the car is returned.