Toyota builds some of the most durable cars and trucks on the market. And, there are models for every segment of the population, from eco models that only exhaust drinkable water into the atmosphere, to large luxury models in the Lexus line. With that said, the fact is, there will still be components that can fail in small numbers and that means work for us. In this article, I’ll cover a couple of items we’ve noticed that we do see these as common repairs in the future, while there may never be a lot of cars affected.
DIAGNOSIS
A common practice when diagnosing suspension and handling complaints is to first look at the basic or common failures. Inspecting ball joints is a very basic place to start, and a close look at bushings and possibly bent components is next.
Obviously a look at the tires is also in order. Wear patterns can tell you a lot about how the car is traveling down the road. Don’t be fooled by a rear tire that has the same wear pattern as the one on the front on the same side. If there is an alignment or suspension component failure, the chance of two tires wearing the same way front and back are nearly impossible. They were probably rotated. Bear in mind that radial tires will continue to wear in the same pattern, even if they are moved to another position on the car. But that’s another article in itself.
With a complaint in hand, a road test is usually the first order of business, but I prefer to do a visual inspection before taking any car out on the road. Sometimes, you’ll have an idea of the problem even before you get back for the post-drive inspection. Just to eliminate the basics though, do a bounce test at both ends of the car to check for weak shocks or struts. A side-to-side wiggle test can sometimes point out a noise or suspension control problem, such as a bad panhard rod or control arm bushings.
I also take a few minutes to just look at the alignment and location of the wheels in the body. Often, there is an obvious problem that can be related to accident damage or mismatched tires, wheels or even suspension pieces. Also look at ride height or differences in height from side-to-side or front-to-back. With the number of lowered cars growing, remember that ride height and attitude can be a factor in alignment specs.
Complaints of wander, shimmy, vibration and noise are much better understood if they are experienced first-hand. What the vehicle owner might be considering a suspension problem may, in fact, be caused by something unrelated to a suspension failure.
I have a special test loop that includes a couple of blocks of smooth, straight and flat pavement with little or no crown. This road is used very little during the workday, so there is almost always full use of the center of the road. I use this stretch of road as a baseline test to check for pulling or wander without the condition of the road being a factor. Of course, I also have a road with very bad pavement for those cars that have problems over rough surfaces, or noise complaints. During your test-drive, turn the radio off, close the windows, and listen and feel with every sense to narrow the focus of your after-drive inspection.
INSPECTION
After the initial test-drive, if you have some idea of the fault, look closely in that area. Toyota has a very complete set of measurements for ball joint wear and movement, and a TSB that explains in detail how to test for excess movement. On trucks in particular, Toyota allows some movement in the ball joints. Don’t be fooled into thinking this is a problem, as it can lead to unnecessary repairs that won’t solve the complaint.
Because of all the variables, I won’t get into specific complaints in this article; every car will be a little different. You need to be able to translate what you noticed on the road test into real possibilities for the cause. Look for areas of rust around fasteners, an indication of movement and generation of heat. In some areas of the country, this may not be a good indicator, but here in the Northwest it is. Depending on the complaint and what you experienced on the test-drive, body repairs, subframe or unibody damage, or parking lot incursions may be part of the problem.
The most likely point of movement in the suspension is at the connection points of the suspension arms, struts or shocks. Bushings do what our muscles do every day in our bodies. They are subjected to compression, expansion and twisting, and must maintain position under all conditions to do their job. Attacked by fluids, temperature and torture from blunt force, bushings are the most difficult to diagnose parts. Because each bushing has a specific purpose, the design often looks weak or may appear to be torn or tweaked when the car is on a hoist but, in normal position, are just fine. Improper installation is often the most common reason for failure, so just because a part looks new, it could have been damaged in just a few days. Get a pry bar out and make sure movement at the mounting points is reasonable.
As I noted above, the position of components can be changed by accident damage, improper installation, use of the wrong parts, or use of parts from a different year or model. Checking position from side-to-side can reveal a lot. Just about all cars today are designed to be symmetrical from side-to-side, unless they are for the Indy or stock car crowd. Look for damaged wheel rims, which may have been hit hard enough to bend suspension pieces as well. While you’re at the wheels, spin them, if possible, and look at the tires from every angle. Look for cord problems and obvious signs of balance or alignment faults.
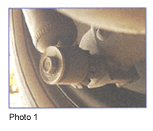 On most Toyota models, and many other makes, the struts or shocks are an integral part of the suspension, so the upper mounts and lower attachment can be a source of problems (see Photo 1). Toyota has issued some TSBs for Camry and Lexus models that involve replacing the upper strut mounts, or tightening them to eliminate rattles.
REAL-WORLD EXAMPLE
“My car shakes over 40 mph.” That was the complaint. Actually, the car shook at any speed over a crawl. The car was a 1997 Lexus LS400, with a little more than 140,000 miles. The car belonged to a real estate agent and was frequently used to haul people and sales gear. The car was clean, well maintained and the owner expected to drive the car for several more years. After an initial inspection and test drive, the determination was that the vibration was coming from the rear suspension. With the car on the hoist, the obvious problem was that the rear wheels felt like they were going to fall off! The problem wasn’t the wheels though.
The LS400 has a multi-link rear suspension with an upper “A” arm. The lower arms are attached at the inner end at the rear subframe with bushings that are the adjustment point for wheel alignment. The front lower arm is attached at the bearing carrier with a tie rod end. The rear arm is attached at the outer end with a bushing. An additional front arm or strut rod is attached at the subframe at the front with a bushing in the rod. The attachment at the rear of this rod is a bushing pressed into the carrier housing. This rear strut rod bushing was the main culprit that was causing the excess movement. It was very obvious with just a visual inspection.
A call to the local Lexus dealer was made, and we were informed that that bushing was only available as part of the bearing housing, and that the cost was extremely high. With labor to replace the carrier housing and the other parts needed to complete the job, the cost was excessive. Our shop owner took it upon himself to find a less expensive repair. After several calls to wrecking yards, other dealers and parts houses, he finally located a parts guy who knew of a solution. The repair involved the installation of an aftermarket bushing kit that replaces the factory metal-clad, press-in bushing with two polyurethane bushings and a metal inner sleeve for the bolt.
Installation Procedures:
After removing the wheel and the through bolt at the strut rod, loosen the front bolt for the rod and allow the strut rod to drop down off of the bearing housing.
Use a bushing remover to press the old bushing out of the carrier housing. You can also use an air hammer with a cutting tip to rattle the bushing out if you are careful not to damage the housing.
Clean the recess in the housing, taking care to smooth out any sharp edges.
Lubricate the inner and outer surfaces of the replacement bushings with silicone paste grease. Insert the bushings into the housing, and then push the inner sleeve through both bushing halves.
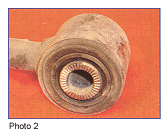
Position the strut rod over the new bushing, insert the bolt and lightly tighten both bolts at the ends of the rod. Important: If the bolts are tightened at this point, as soon as the car is lowered to the floor, the front bushing will not be able to twist far enough and will tear (see Photo 2).
After lowering the car to the ground with the suspension in its normal position, or by using an under-hoist jack to move the suspension up, tighten the strut rod bolts to the proper torque.
Check alignment specs.
Road-test the vehicle again.
In this case, the repair was not complete. The strut rod bushing had been bad long enough that the tie rod for the forward lower arm at the bearing housing was wasted. We replaced both rods with new parts and, after an alignment, the vibration was gone. Both sides of the car had the same problem.
SUSPENSION PROBLEM?
Another example of careful inspection and consideration of complaint and diagnosis turned up another common, but previously unnoticed, problem. The complaints were many and the car was a 1996 Toyota Camry with almost 200K on the odometer. The customer complained of pulling, noise and hesitation.
The initial inspection showed a fairly well maintained, clean car that ran and drove well up to a point. The car had some torque steer and vibration that changed with acceleration and deceleration. None of the symptoms were severe, or even close to the way the customer described them. The car just felt “loose” and disjointed on the road. The shocks and tires had already been replaced, the new tires showed no signs of any alignment problems yet and the previous repairs had been done properly.
On the hoist, an inspection showed no obvious problems. There was no indication of accident damage or bent parts. We were about to return the car to the customer, but decided that each technician in the shop (all four of us) should take turns driving the car to get a different perspective on the customer’s complaint. Sometimes that is the only way to get beyond a certain perspective and look beyond the “norm.”
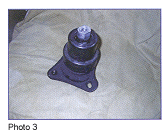 I don’t remember who found it, but it was so obvious that it’s a wonder it was so hard to find. The center front engine mount (see Photo 3) had nearly four inches of travel – enough that when the engine torqued against the torque control rod, the engine twisted far enough to deflect the whole front drivetrain. This could only be witnessed by having the hood open while holding the brakes and accelerating the engine with the transmission in gear. In normal driving, we had never applied that much torque. We started having second thoughts about the mild manner of the customer. Maybe the high miles had been harder on the car than originally thought.
After replacing the front engine mount and the damaged torque rod, we road-tested the car and found a much tighter feel. The torque steer was gone, the acceleration was crisper and was vibration nonexistent. This was truly a test of diagnostic skills and inspection going beyond the obvious.
With Toyota products, there are no failures that recur frequently enough to see patterns develop. The point of this article then is to encourage you to look beyond the ordinary when all else has failed to resolve the complaint.

