To say the first Subaru brought to our shores in 1969 by Malcolm Bricklin was different would be an understatement. The Subaru 360 was a shrunken version of a VW bug, with a small two-cycle engine in the back. It fit into a market niche that probably didn’t exist at the time in the U.S.; over 60 mpg wasn’t needed with gas prices under 30 cents a gallon! With a 0-50 mph time of more than 30 seconds, they didn’t really appeal to the muscle car set either.
The 360 didn’t last long because it also lacked some important parts that our government deemed necessary for operation on our highways. That little car, however, became a seed of interest in a company that would come to produce vehicles that were different, but well engineered and durable. Subaru has brought all-wheel-drive to the masses and provided millions of miles of dependable transportation to many happy owners.
One rule of vehicle design is to have the most powerful, efficient and durable powerplant possible. Sometimes those parameters collide with over-engineering or complexity. This article is about a Subaru design that became too complicated, and suffered as a result. The problem is a failure of the head gaskets.
The models that are most affected by this problem are 1997-2000 Legacys with the 2.5L DOHC engine. Although some other Subaru engines are similar, the failure rate for those engines is much lower. Subaru has redesigned the head gaskets, employing MLS technology. This article won’t address the engineering that caused the problem, but will instead focus on the diagnosis and repair.
DIAGNOSIS
Most of these cars are family driven, used for hauling soccer players, occasional ski trips to the mountains and trips to the grocery store. We work on hundreds of these cars every year. Head gasket failures haven’t been rampant, but have occurred often enough to be of concern. Though there doesn’t seem to be any common denominator for failures, the standard causes of overheating, neglect and extreme use, may play a part in early failure.
 We have seen failures at as little as 50,000 miles, and have other cars that have no sign of problems, even at 150,000. One item to note is that here on the West Coast, we see many more Japanese-built Legacys than you might see in the East. A number of different gaskets have been used in this series of cars, depending on engine numbers and manufacturing dates. There may be a correlation, but I haven’t been able to put a finger on that yet.
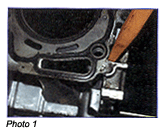
The most common first sign of leakage at the head gaskets is seepage of coolant at the lower rear corner of the driver’s side cylinder head (see Photo 1). We often catch this leak during routine service by following a trail of coolant from the under-engine crossmember. There may not be a serious loss of coolant, but there will be staining that indicates the failure. Be careful though that the coolant hasn’t collected at this point from a leak at the water pump, which is directly forward of this area. The customer may not have even noticed a coolant loss or overheating.
There can be other indicators on cars that do not show external leakage. A knock sensor code, caused by excessive pinging (pre-ignition) or overheating on long “pulls,” such as mountain driving, can be an indication of impending failure. Engine misfire, excessive cooling system pressure (from compression leaking into the cooling system) or consistent overheating are also good indicators of head gasket failure. A block test using test fluid at the radiator may or not detect this problem, unless the leak has entered the combustion chamber. Evidence of coolant in the intake or exhaust also can be consistent with the failure of a cylinder head gasket.
However you determine that the source of the problem is a head gasket failure, the only repair is disassembly of the engine.
SUBARU ENGINE DESIGN
Almost everyone in the auto repair industry knows the Subaru family of engines is a little different than most. Except for some very high-dollar exotics like Porsche, Ferrari and BMW motorcycles, only Subaru uses a horizontally opposed cylinder arrangement. This design is space- and weight-efficient, very naturally balanced and allows good power output in a small package.
 Except for a side trip with the Justy, Subaru has used the boxer layout on all of its models since the early 1970s. This design makes use of two very short cylinder heads; for this reason head warpage is very unusual. One disadvantage to this design is that there are some very long passages to circulate coolant through both heads and maintain consistent temperatures throughout.
The Legacy engine has been a great engine design with years of development and a record for durability and reliability. The SOHC 2.5L engine has had far fewer failures. The smaller displacement engines of this design do not exhibit the same head gasket failures either. The cylinder heads do not seem to be the problem.
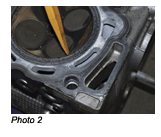
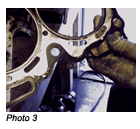 When looking at the failure of the head gaskets, it becomes clear that where these gaskets usually fail is the sealing surface between the head, crankcase, combustion chamber and gasket (see Photo 2). My “guess” is that the size of the cylinder bore is the culprit. The sealing area between the combustion chamber and cooling passage is reduced too much. This lower left area of the engine is also probably the “hottest” area of the engine. The original coating on the head gasket is usually completely gone in this area (see Photo 3) whenever we pull these engines apart. Of course anything that can cause overheating, such as a bad thermostat, inoperable fan or lack of coolant, can hasten the failure.
 REPAIR PROCEDURES
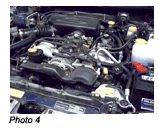
One negative of the boxer engine design is that it’s wide (see Photo 4). Removing the cylinder heads in the car is impossible. This is not much of a disadvantage though, because engine removal is quite easy. The engine is light compared to most and disassembly isn’t the horror that other boxer designs have become. In all Subaru cars, the engine can be removed without removing the transaxle; even the hood can be left in place.
Engine Removal:
Disconnect the battery and remove it from the car.
Release the fuel pressure by opening the filler cap.
Drain the cooling system and the crankcase.
Discharge the A/C system, capturing the refrigerant properly.
Disconnect the control cables, wiring and fuel and coolant lines between the body and the engine. Remove the intake hoses and sensors as necessary.
Disconnect and remove the cooling fans.
Remove the radiator.
Remove the power steering pump with the lines attached and tie them out of the way to the side.
Disconnect the crossover exhaust pipe from both cylinders and remove it from the converter inlet and the car. You could leave it in place, but it just ends up being in the way.
Disconnect the engine mounts from the crossmember. Remove the attaching bolts and nuts from between the engine and transaxle. The starter can stay in place on the transaxle.
On A/T cars, remove the timing inspection cover and the torque converter to the flexplate fasteners. Remove the engine torque strut.
Support the weight of the engine with a hoist while supporting the transaxle with a floor jack. Remove the engine out of the top.
br>
Disassembly:
Follow teardown instructions carefully to avoid damage to the camshafts. The engine should be cool before major teardown to avoid warpage problems.
Remove all externally mounted accessories, such as the alternator, drive belts and tensioners.

Remove the intake manifold, ignition coil, plug wires and injectors as an assembly.
Remove the timing covers, set the timing at TDC #1 cylinder, and loosen and remove the timing belt. You will need a special holding tool (see Photo 5) to remove the camshaft sprockets (they are plastic, so any other method could spell broken parts). It’s also a good idea to mark them for location to aid in assembly. Remember that this holding tool is not used for aligning the cams during reassembly.
Remove the valve covers. This is a good time to get the engine number off of the top left, rear corner of the block, along with the manufacture date of the car, and to start lining up replacement parts.
After removing the camshafts (make sure you have marked them for reassembly) and the cam followers, loosen the cylinder head bolts with a long breaker bar while another technician holds the engine with a pry bar. We use the chain that’s used to pull the engine as the lever holder for this task. Often, the head bolts are not very tight, but some can be a test of muscle.
Inspection:
Standard engine repair practices are used for inspection.
Check for cylinder head warpage or erosion damage. Inspect the cylinder bores for cracks or damage due to coolant entering the cylinders.
Inspect for signs of damage to the crankcase sealing surface. Use a straight edge and check at every sealing point, paying particular attention to the surfaces surrounding the cylinder bores.
Though we have not had any instances of severe warpage or erosion damage, if there is any question, send the heads to a knowledgeable machinist for evaluation. Any resurfacing of the heads will complicate reassembly due to the change in distance between the mounting points for the manifolds. Resurfacing should be limited to the bare minimum necessary for proper sealing.
Reassembly:
AERA has issued a solution for failure of these head gaskets that involves a slightly different torque procedure. The latest replacement head gaskets have additional layers of steel, and the coating appears to be more substantial.
Coat the head bolt threads with engine oil.
Tighten all bolts in sequence to 22 ft.-lbs. (29 Nm).
Tighten in sequence to 51 ft.-lbs. (69 Nm).
Back off all bolts by 180° in sequence, then 180° again.
Tighten bolts 1 and 2 (center, top and bottom) to 25 ft.-lbs. (34 Nm).
Tighten bolts 3, 4, 5 and 6 to 11 ft.-lbs. (15 Nm).
Tighten all bolts in sequence an additional 80° to 90° (do not exceed 90° at this time).
Tighten all bolts again in sequence an additional 80° to 90°.
The total re-tightening angle should not exceed 180° total.
Additional Items:
The rest of assembly involves reinstallation of covers, seals, cam drive components and external accessories.
You will again need to use the special holding tool to reinstall and tighten the camshaft sprockets.
Inspect the water pump for any signs of leakage; replace if necessary.
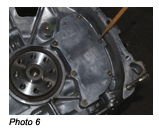
Since the engine is out, pull the flywheel or flexplate and inspect the rear crankshaft seal. While the seal may not be leaking, there is a cover for the breather system (see Photo 6) on the rear face of the crankcase that very often leaks.
After reinstalling the engine, hoses and radiator, either pressure-test or vacuum the cooling system down with a filling system to check for leakage. Fill the system with coolant, add oil and off you go.
FINISHING UP
Of course there will be more to this story as these cars accumulate mileage. As with any engine design, neglect will worsen the problem and a relatively simple head gasket replacement won’t complete the repair. Being aware of this potential problem will give you a heads up when one of these cars starts to exhibit the symptoms previously listed.
We haven’t had a recurring problem with this design as long as we use the updated head gaskets and take extra care during reassembly. These are popular cars and owners tend to love them for all the uses they fill. Completing this repair will keep them happy and loving their Subarus.

