When performing restoration services on old Ford engines, you should not be surprised to learn a good many of the Ford flathead engine cores will end up with at least a couple of broken head bolts during disassembly.
Of course, given the high age of flathead engines, you might expect to encounter a few headaches due to broken or frozen plugs.
Introduced as a V8 engine in 1932 with a lifespan that extended in the U.S. until 1953, some of these engines that you see could be more than 70 years old.
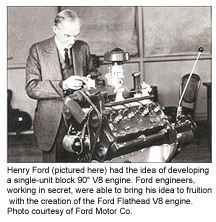 Besides their age, flat motors have other special problems. First, the flathead design means head hardware is exposed at all times to weather and coolant so corrosion results. Second, several bolt holes in the block on both sides (between cylinders) crack. It’s rare to find any of them not cracked, and experience says that although these cracks do not create a problem that would either cause the rejection of the block or even any particular repair regimen, they do allow coolant to seep around these bolts and create rust. At the same time, I have seen no indication that back in the day anyone felt an obligation to coat threads with an anti-seize or anti-corrosion compound and you know how that can cause problems. I also suspect hardened head bolts going through innumerable heat cycles are metal fatigued and when the kind of torque required to break some of these bolts loose is applied – SNAP!
OK, so now you have broken bolts or studs and it’s time to remove them without causing any more damage. Do you start beating them up with a hammer and hacking at them with a chisel, and generally flailing around in desperation, or what? Well, everyone has their own preferred methods, but I’ve got one or two that might help you out.
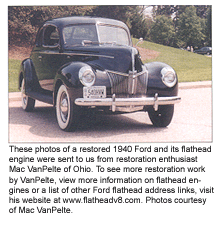 First, if you have enough of the bolt or stud intact to grab with a stud puller, that’s probably the way to go. However, don’t go jacking around cold turkey on these things or it could get much harder very quickly. I usually try a moderate pull first to see if it will come out, but if by the time I get about half or so of the torque spec loaded onto the tool it hasn’t budged, I stop. A most reliable way to loosen such hardware in my experience is to heat it up and use paraffin wax to help lubricate the hidden threads. The wax (common jelly-jar sealing wax or home canning wax) tends to wick down into the threads – rust seems to love the stuff. The heating is done primarily to the stud or bolt to avoid damage to the block. I will often heat the bolt to red hot but not heat the block anywhere as much. Heating and cooling, because there is a difference in the coefficient of expansion between the hardened steel hardware and the cast iron block, also helps to loosen the threads. When the paraffin is added, the threads do not bind back up where it flows in. It’s a judgment call, but depending on how crusty the block is, I may do two, three or four heat/cool cycles with the paraffin before I try to remove the hardware. The temptation is to hit it once and jump right on it. This could either save you a few minutes or cost you several hours depending on your luck that day.
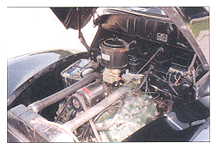 If you are patient, work methodically and have just a little luck, you should be able to get all the studs out this way. If not, you may find that you get to drill them all out and use the remover tools. You probably know what that’s like, so I won’t terrorize you with a reiteration. Just remember those old Ford head bolts and studs are hard stuff.
But wait, what if you don’t have enough to grab onto with the stud remover? There are two good answers for this and each has its own variation on technique. The first is if you have anything left of the stud or bolt above the deck. In that case, you wire brush what’s left clean and thread on a 7/16 coarse nut for whatever distance you can. Next, use a torch and heat both the nut and the stub up. If the nut is red that’s fine, but remember you can’t go too crazy with the stub piece or you can overheat the block. If you are very careful you can get the stub nearly glowing. As soon as you have this condition, hit it immediately with the welder. I prefer a MIG unit set at a fairly high heat to help get maximum penetration. I use my HTP American MIG-160 at its highest heat and get very good results. The key is to securely weld the nut and stub together.
 If your welding isn’t up to par, you probably won’t make this work. The good news is that after you twist the nut off, you get to try again. If the bolt or stud is broken at or below the deck it gets trickier. However, it is very rare that the break happen at much below the deck. In this case you use the welder first to add a bead to the stub, building it up so you can then weld the nut on. Again, remember that good penetration and clean surfaces are important. In both cases, before the block and stub are cooled down and after the welding is completed (so you don’t contaminate the weld), add the paraffin for the same reasons discussed earlier. In both cases, heating and cooling more than once can be helpful. In both cases, you want to be very careful not to do welding damage to the block.
Note: A bit of caution on welding and heating: When heating anything, you have the choice to heat wide or heat in a small area and concentrate heat. When heating to just get the paraffin wicked in, heat the area in general and keep the temperature down to 400

