 Some of the most stressed-out parts of a high-dollar engine repair are the relatively inexpensive nuts and bolts that hold it all together.
And, if you’re building a performance engine — whether it’s for the street or the racetrack — using stock fasteners in the most critical areas could be asking for trouble. The crank, rods and heads may be in jeopardy if you bolt it all together using stock or otherwise inferior fasteners.
No matter what the application, there is not one fastener that is right for every job. Different materials and designs have different advantages in different applications, and selecting the right fastener for the job may be difficult at best when choosing from such a wide array of materials.
Variables such as strength, temperature, movement, vibration and fatigue all come into play when deciding on the right bolt or stud for your repair. The following technical article details some of the basic definitions and facts about fasteners that will show you why not all fasteners are the same and how to be choosy when selecting the right fastener from your supplier.
Tensile Strength
Tensile strength is the most common mechanical property that is referred to when talking about fastener strength. It is the maximum tension-applied load the fastener can support before it fractures.
Fatigue
Fatigue in a fastener can cause sudden, unexpected failures. A fatigued fastener can fail even when loads are below the strength of the material due to operating under constant cyclic loads. Fatigue strength is often defined as the maximum stress a fastener can withstand for a specified number of repeated cycles before it fails.
Some of the most important fasteners in the engine such as cylinder head bolts, connecting rod bolts and main bearing and cap bolts are subject to fatigue forces. It is important to use fasteners with high fatigue strength, as well as the tensile strength, to hold the joint together under high-pressure forces in these applications.
 Torsion
Torsion strength is typically the amount of torque or friction a fastener can safely handle before it breaks. One thing to remember is that when torque is applied to a fastener, most of the input is spent in overcoming friction. Roughly 85-95% of the energy you have spent tightening the fastener is lost, leaving only about 5-15% in actual clamp-load.
Because of this, any slight variation in friction can lead to significant changes in resulting preload conditions. These variables include surface roughness, surface finish, lube, load-range, dimensions, temperature and torque sequence. This is why it’s so important to achieve consistent friction conditions and to use the methods that allow the most consistent torquing. So the preload target will depend on the lube you use (most use a Moly lube or 30 weight oil) and the tightening sequence.
Did You Know?
When engineers design a new engine, one of the many tasks they have to do is figure out what size head bolts to use and how much torque the bolts will require to achieve the proper clamping force. Some of this comes from previous experience, and some comes by trial-and-error testing. The compressibility and spring-back of the head gasket, the configuration of the cylinder head, the number of head bolts around each cylinder, the comparative lengths of the head bolts (all the same length or different lengths), etc. are all taken into account when figuring how much torque is required to achieve a certain clamping load.
Proof Load
Each material has a certain amount of elastic range, meaning the fastener can be stretched to a certain point, but when the load is released it can return to the original shape. But if the load applied exceeds the elastic range and therefore causes the fastener to go past the yield point, it then reaches what is called the plastic range of the fastener. The fastener material is no longer able to return to original size.
The proof load is an applied tensile load that can be applied before permanent deformation. It represents the useable range of a fastener before it goes into its “plastic range” where it cannot return to its original size and shape. At this point of yield, permanent elongation of the fastener sets in. If you continued to load the fastener, it will reach its ultimate tensile strength in which “necking” or elongation occurs until it is stretched to the point of breakage.
 Shear Strength
Shear strength is the maximum load a fastener can take before it fails when it is applied at a right angle to its axis. A load occurring in one transverse plane is called single shear, while a load that is applied in two planes, where a fastener may be sliced in three pieces, is called double shear.
Materials
Performance applications require high quality, precision tolerance fasteners to achieve the clamp-load and fatigue strength that is needed in a harsh environment where there are extreme forces placed against them. Materials used to make fasteners vary with the application and load-carrying needs.
The most common high-grade material is medium carbon alloy steel that is used in making SAE J429 Grade 8 bolts. These bolts are often used by OEMs in high stress applications and in some racing applications and are rated at 150,000 psi tensile and 130,000 psi yield with a proof load of 120,000 psi.
However, one of the issues with Grade 8 bolts is that there are some areas in performance engines where you may not want to use them. An example was on the old belt drives where street rodders were using Grade 8 for accessories, and they were suddenly breaking bolts. Many engine specialists were left scratching their heads until someone figured out the bolts were fatigued — since the higher the carbon steel, the more they are prone to fatigue.
Since fastener manufacturers add alloys to carbon steels and change the properties to suit specific sealing needs, always check with your supplier prior to using fasteners in a performance engine.
Preload
There is definitely a relationship between torque and preload, but there is some confusion as to the difference. With connecting rods, it is not too difficult to use the stretch method and to measure the preload by measuring stretch. But in head bolts, it is much more difficult to measure and you’re basically reliant on the torque wrench to stretch the bolt. A torque wrench needs to be recalibrated often and you need very clean threads that have been burnished in so there is very little friction. The preload is the force on the bolt that clamps the joint together. Torque, however, is just the mechanism used to get the desired preload.
Lubricants
There’s a huge difference in torque, depending on what type of lube you use, whether it’s engine oil or extreme pressure lube (EPL), which is used quite a bit in NASCAR. Some in the industry recommend that the higher the torque, the more efficient lube you should use because it’s better for the fastener and the torsional stress. Molybdenum-based assembly lubes, graphite, Teflon-based products and even beeswax can all be used to lubricate bolt threads and heads.
But these lubricants typically reduce friction much more than ordinary motor oil, so using any of these products requires reducing the applied torque accordingly. Some experts recommend using 20% less torque when tightening a head bolt that has been lubed with molybdenum, graphite, Teflon or wax. Always follow the lubricant or bolt manufacturer’s recommendations (aftermarket head bolts and studs are usually supplied with a special lubricant).
Head Studs
Generally, when you torque the stud, you put a certain amount of stretch on it. The smallest diameter of the stud is where the stretch is going to occur. So if the threads are your smallest diameter, that’s where it will stretch. If you make the body smaller (undercut), then you begin to make the stretch in the body of the fastener be it a stud or a bolt, as opposed to making it occur in the threads.
That’s why in a rod bolt, you rarely see one that doesn’t have an undercut. With head studs, depending on the application, you may have an undercut or you may have an in-between or full-body stud. An in-between doesn’t elongate much while achieving its clamp-load as opposed to a full undercut stud that will actually elongate a little further. One stud may stretch 0.005” to achieve 20,000 lbs. of clampload. The other one may stretch 0.0075” to get the same amount of clampload.
You can reuse any bolt as long as you don’t get into the yield of the bolt and stay within 80% of its yield strength. You can still yield even a very strong fastener so it’s a one-time-only-use fastener. It depends on what you want to design and what torque you utilize.
————————————————-
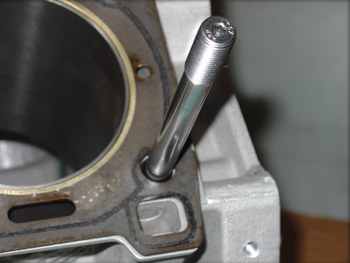 Head Bolt Installation Tips
By Larry Carley, technical editor
Head bolts are truly one of the most critical fasteners in any engine. Consequently, it’s extremely important that all the head bolts be in perfect condition and are installed and lubricated properly so they are not overloaded. The following are useful tips for technicians and engine specialists who spend any time sealing up engines.
1. Make sure all the head bolts are in perfect condition with clean, undamaged threads. Dirty or damaged threads can give false torque readings as well as decrease a bolt’s clamping force by as much as 50%! Wire brush all bolt threads, carefully inspect each one, and replace any that are nicked, deformed or worn. If a bolt doesn’t thread into a hole smoothly with finger force alone, there is a problem.
On aftermarket studs or bolts, never use a die to recut the threads. Most have “rolled” threads, which are stronger than standard threads. Use a thread chaser to clean up the threads.
2. Dirty or deformed hole threads in the engine block can reduce clamping force the same as dirty or damaged threads on the bolts. Run a bottoming tap down each bolt hole in the block. The tops of the holes should also be chamfered so the uppermost threads won’t pull above the deck surface when the bolts are tightened. Finally, clean all holes to remove any debris. If the block deck has been resurfaced and you are using studs rather than head bolts, chamfer the top of each hole
3. For head bolts that screw into blind holes, lightly lubricate the bolt threads as well as the underside of the bolt heads with engine oil. Make sure the bolts do not bottom out or hydrolock because of oil trapped in the blind hole.
For head bolts that extend into a coolant jacket, coat the threads with a flexible sealer. Failure to coat the threads may allow coolant to leak past the bolt.
4. Because TTY head bolts are permanently deformed once they are tightened, they should not be reused. Reusing TTY bolts will cause them to stretch further, which increases the risk of breakage. A stretched bolt also will not hold the same torque load as before, which may cause a loss of clamping force resulting in head gasket leakage.
Did You Know?
In an engine with 4” cylinder bores and peak combustion pressures of around 1,100 psi, each cylinder exerts about 13,827 lbs. of pressure against the cylinder head at full throttle. In fact, head bolts may have to handle loads of more than 5 tons per bolt at wide-open throttle!
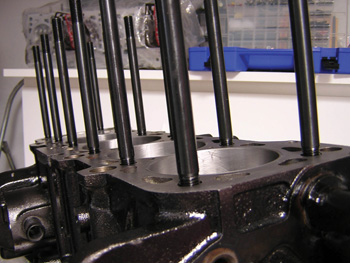 5. Check bolt lengths. Make sure you have the correct length bolts for the application and for each hole location (some holes require longer or shorter bolts than others). If a bolt is too short and only engages a few threads in the block, it may pull the threads out of the block.
Bolts should also be measured or compared to one another to check for stretch. Any bolt found to be stretched must be replaced because 1) it may be dangerously weak, 2) it won’t hold torque properly, and 3) it may bottom out when installed in a blind hole.
6. When installing head bolts in aluminum cylinder heads, hardened steel washers must be used under the bolt heads to prevent galling of the soft aluminum and to help distribute the load. Make sure the washers are positioned with their rounded or chamfered side up, and that there is no debris or burrs under the washers.
7. Resurfacing a cylinder head decreases its overall height, so be sure to check bolt lengths to make sure they won’t bottom out in blind holes. If a bolt bottoms out, it will apply little or no clamping force on the head, which may allow the gasket to leak. If a head has been milled and one or more head bolts may be dangerously close to bottoming out, the problem can be corrected by either using hardened steel washers under the bolts to raise them up, or by using a copper head gasket shim in conjunction with the new head gasket to restore proper head height.
8. Always look up the specified tightening sequence and recommended head bolt torque values for an engine before installing the head gasket. Never guess. Complete cylinder head torque specifications for domestic and import vehicles can be found in service manuals and torque tables published by gasket manufacturers.
9. Use an accurate torque wrench to tighten standard-type head bolts in three to five incremental steps following the recommended sequence and torque specs for the application. Tightening the bolts down gradually creates an even clamping force on the gasket and reduces head distortion. It’s a good idea to double check the final torque readings on each head bolt to make sure none have been missed and that the bolts are retaining torque normally.
If a bolt is not coming up to normal torque or is not holding a reading, it means trouble. Either the bolt is stretching or the threads are pulling out of the block.
With TTY head bolts, use a “Torque-To-Angle Indicator” gauge with a torque wrench to achieve proper bolt loading. Don’t guess on the angle. Be exact.
10. If a head gasket requires retorquing (most do not), run the engine until it reaches normal operating temperature (usually 10 to 15 minutes), then shut it off. Retighten each head bolt in the same sequence as before while the engine is still warm. If the engine has an aluminum cylinder head or block, however, don’t retorque the head bolts until the engine has cooled back down to room temperature.
On some applications with retorque-style head gaskets, it may be necessary to retorque the head a third time after a specified time or mileage interval due to the design of the engine. Follow the vehicle manufacturer’s recommendations.

