When I think of a “sports sedan” I usually think of the German variety. A BMW 3 or 5 Series, or maybe an Audi Quattro or “E” series Mercedes. Since the early 1990s there has been another choice, but the sales figures have kind of kept these cars a secret. The cars I’m talking about are in the Lexus line of upscale luxury cars, but are either sold as an entry-level car above the ES (fancy Camry), or a step below the flagship LS Series.
The GS and more recently the IS platforms are high-quality, performance luxury models with a conventional front engine, rear-drive or all-wheel-drive layout. Initially, these cars were powered by an in-line six-cylinder from the Toyota Supra line. Later models have gone to V6 and V8 powerplants. Since these cars are somewhat rare (you have to look to spot one on the road), many people would mistake them for their luxury “fluff mobile” cousins in the LS class.
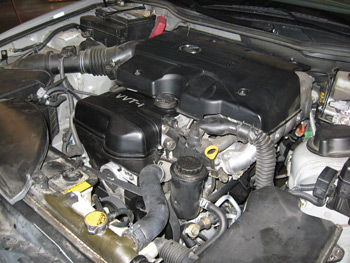
The focus of this article will be the timing belt replacement on a 2001 Lexus GS 300 with the in-line six-cylinder 2JZ-GE engine with VVT-i (Toyota’s variable valve timing). Nothing can spoil the resale value of a high-dollar car more than an engine failure. Due to the complexities of the valve timing and internal engine clearances, these engines will most likely bend valves if the belt fails, or if the belt is installed incorrectly. For these reasons, I would recommend that you read through this article and the service manual description for this job very carefully before starting this repair. There are also differences between models on this platform that can impact the way certain components are removed.
WHEN TO REPLACE
Recommended replacement intervals for timing belts are all over the map these days. Depending on which tech manual or tech assistance site you access, you can get widely varying mileage and time suggestions.
 My advice is to look closely at the accessory belts, note any cracking or evidence of replacement, and then factor in the use of the car and its maintenance history. Cars that are driven primarily in hot, dry climates will probably benefit from earlier replacement than those living in more moderate conditions.
Due to the possibility of engine damage if the belt breaks or jumps time, I would not recommend waiting beyond six years or 90,000 miles, which is the OE-recommended interval for this engine.
A quick scan through service bulletins, tech assistance requests and first-hand experience with this repair leads me to advise that extra care be taken on this repair. Ensure that every step is done correctly, and the proper tools and procedures are used to prevent comebacks, driveability complaints or difficulties in completing this service.
FIRST STEPS
 Because of the interference possibilities, I suggest removing the ignition key and hiding it so the engine does not get cranked by mistake while the belt is off. The job is easier if it is on a hoist and the lower engine covers are removed. Drain the coolant and remove the fan shrouds.
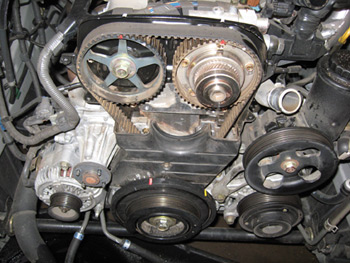
The various models and yearly changes to this series of cars make an initial inspection worthwhile after checking a repair information source. To prevent the possibility of damage, I would recommend removing the radiator and fan just to provide more working space (see Photo 1). Without removal of the radiator and shroud, space to remove the crankshaft pulley bolt is pretty much non-existent. (On SC 300 models, the battery and battery box will also need to be removed.)
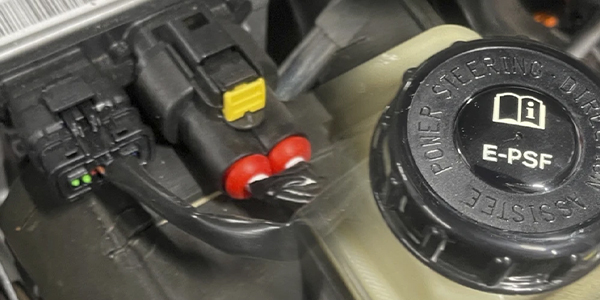
The serpentine belt tensioner may turn either direction depending on model, and the pulley mounting bolt will have threads of one direction or the other, depending on the adjusting rotation of the tensioner. Remove or loosen the brackets for the external accessories (alternator, power steering pump and A/C compressor) as needed to allow removal of the lower front engine cover. Depending on the year, model and body type, some accessories and their brackets are removed or can be left in place to save repair time.
The two upper timing belt covers can now be removed to allow the setting up of the engine for disassembly. Toyota designates these covers as cover 3 (the large piece with VVT-i on it) which looks like the front of a large valve cover, and cover 2, the center part of the front engine cover. If you haven’t already done so, remove the serpentine belt tensioner. Using a suitable tool to hold the crankshaft damper, loosen but don’t remove, the bolt and pulley at this time.
ENGINE SETUP
 In order to get the engine in the correct position for removing the timing belt, the tension on the variable timing must be removed to allow the engine to be at actual TDC.
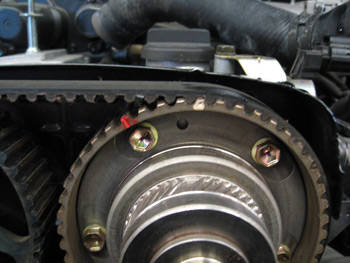
Turn the crankshaft clockwise to align the main timing mark (see Photo 2) on the damper with the “O” mark on the number 1 timing cover (lower part of front cover). There are two marks on the crankshaft pulley and two marks on each of the camshaft sprockets. The main crankshaft timing mark is 60 degrees counterclockwise from the sub-timing mark. The main camshaft timing marks are 30 degrees counterclockwise from the sub-timing marks.
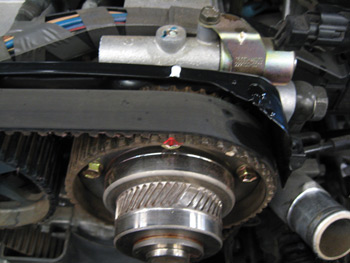 Note the location of the camshaft timing marks at this point. On this engine, I recommend that the marks be painted (preferably with different paint colors) to more easily reference the proper marks and locations (see Photo 3), with the hard-to-see marks on the number 4 timing cover (inner timing belt cover, see Photos 4a and 4b). Obviously, if the camshaft marks are not anywhere close, turn the engine another revolution clockwise and start the alignment process again.