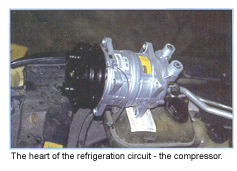
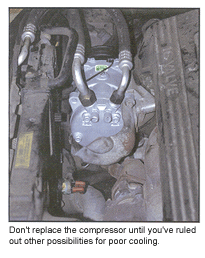
The compressor is the heart of the refrigeration circuit. It pumps and pressurizes the refrigerant to move it through the A/C system. Compressors work hard and run hot, up to several hundred degrees and several hundred pounds per square inch of internal pressure, yet they rely on only a few ounces of lubricant to keep their parts moving. But if the lubricant is lost because of a leak, or the lubricant breaks down due to contamination, the compressor won’t last. Sooner or later, the compressor will call it quits.
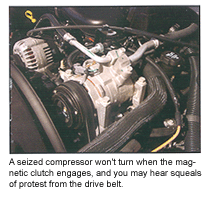
 The most common symptom of a compressor failure (besides no cooling) is a seized compressor. It won’t turn when the magnetic clutch engages, and you may hear squeals of protest from the drive belt. Or, the belt may have already broken or been thrown off its pulleys.
Loss of lubrication is unquestionably the most common cause of compressor failure. This can happen when there’s a refrigerant leak somewhere in the system that allows refrigerant and oil to escape. Typical leak points are hoses, hose and pipe connections (O-rings and flange gaskets), the evaporator, condenser or the compressor shaft seal. An electronic leak detector or dye should be used to find the leak so it can be repaired.
A restriction inside the A/C system also can starve the compressor for oil. Oil circulates with the refrigerant, so if the orifice tube or expansion valve is blocked it may cause the compressor to run dry and seize.
Even if a compressor is still turning, it may have to be replaced if it’s leaking, making excessive noise or not working correctly. Some compressors are naturally noisier than others, but loud knocking noises can sometimes be caused by air in the system (the cure here is to vacuum purge the system to remove the unwanted air, then to recharge the system with refrigerant). Metallic noises and bearing noise are usually signals that the compressor is about to fail.
A new compressor may be needed if the unit is leaking internally or not producing enough pressure due to bad reed valves, worn piston rings, or worn or scored cylinders, etc. A worn compressor or one with internal problems will not be able to develop normal operating pressures with a full charge of refrigerant. This kind of problem can be diagnosed with an A/C gauge set.
Compressor operation can be affected by sensors in vehicles with automatic temperature control systems. Some have an A/C pressure transducer (usually mounted in the high side line) to monitor refrigerant pressure and shut off the compressor if pressure gets too high, a compressor temperature sensor to turn off the compressor if it gets too hot and/or a compressor rpm sensor to monitor belt slippage. Mitsubishi, for example, uses a “belt lock controller” to disengage the compressor if the drive belt slips or the compressor seizes.
Compressor Clutch Problems
If the compressor isn’t turning, make sure the magnetic clutch engages when energized. Underlying problems here may include a bad relay or fuse, a wiring problem or a defective clutch. If the clutch fails to cycle on and off when the A/C is turned on, jumping the clutch lead with a jumper wire from the battery will show if the problem is in the clutch or elsewhere. If the clutch engages, the problem is the clutch power supply (relay, fuse, wiring, switch or control module). Refer to a wiring diagram and work backward toward the battery to find out why the voltage isn’t getting through.
 Many A/C systems have a low-pressure cutout switch that prevents the compressor clutch from engaging if system pressure (the refrigerant charge) is too low. This is designed to protect the compressor from damage in the event of a leak. So if the clutch isn’t engaging, check the refrigerant charge and the cutout switch. The clutch air gap is also important for proper clutch operation. If the clearance is not correct, the clutch may slip and burn or not engage at all. The specs can be found in a service manual along with adjustment procedures. Generally speaking, most clutches call for a 0.015″ to 0.040″ press fit clearance.
What’s Really Wrong
How often do compressors fail as a result of “manufacturing defects”? Not very often. According to one compressor manufacturer who examined 75 compressors that had failed and were returned under warranty, only two were found to have manufacturing defects. The rest failed because of problems such as too little oil in the system, air in the system, contaminants in the system or “installer error.” The latter category included using the wrong type of compressor lubricant, not using enough lubricant, using non-approved flushes to “clean” system parts and using cross-contaminated refrigerants. Debris left over from a previous compressor failure was the most common cause of repeat compressor failures.
Always use the type of lubricant recommended for specific compressors (see chart below). This is especially important with rotary vane and scroll-type compressors. A replacement compressor may or may not contain lubricant from the factory. In some cases, the shipping oil must be drained before the compressor is installed. In other cases, the compressor may contain a POE or PAG lubricant that may or may not be compatible with the vehicle’s requirements. Follow the compressor supplier’s installation instructions to the letter to avoid warranty problems later on.
Before adding fresh oil to a system, all the old oil should first be removed. This will prevent cross-contamination of lubricants and reduce the risk of overcharging the system with too much oil (which can cause cooling problems). Note: Always refer to the OEM oil capacity chart for the vehicle application.
Flushing Following a Failure
When a compressor fails, it may spit metallic debris into the A/C system. Most of this debris ends up in the condenser where it can block tubes and interfere with efficient cooling. Some of the debris may be carried to the orifice tube or expansion valve and create a blockage. Debris can even be blown back into the suction tube. If not removed by flushing, it can be sucked back into a new compressor and cause it to fail.
Flushing the hoses is always recommended following a compressor failure. Flushing the condenser is also recommended. But with many condensers, replacement is the only sure-fire way to get rid of contaminants. Older serpentine-style tube-and-fin condensers can often be flushed successfully, but parallel-flow condensers are very difficult to clean. So too are newer-style condensers with extremely small extruded tubes. For these kinds of applications, the condenser should be replaced. It’s expensive, but not as expensive as ruining a new compressor because of residual debris or sludge in the old condenser.
After flushing, install an in-line filter after the condenser to trap any debris that might still be inside. The filter will prevent anything that works loose from being carried to the orifice tube.
You also should install a filter screen in the suction hose at the compressor inlet to protect the new compressor from any debris that might be upstream inside the suction hose or evaporator.
Issues of Oil
Another reason for flushing is to remove residual oil from the system. This is necessary when retrofitting an older R-12 system to R-134a refrigerant, but it’s also a good way to make sure the system contains the right amount of oil. Simply adding oil to the system to replace that which has been lost is a guess at best, because there’s no way to know how much has been lost due to leakage.
 The oil issue was discussed extensively at the Mobile Air Conditioning Society (MACS) Worldwide trade show and convention in January. Understand that estimating a couple of ounces here and there for replacing an accumulator, receiver/drier, condenser, compressor or hoses is not a very accurate means of determining how much oil needs to be added to the system when it’s recharged with refrigerant. Flushing gets rid of all the oil so the exact amount specified by the vehicle manufacturer can be added back to the system.
What happens if there’s too little or too much compressor oil in the system? Not enough oil in the system will reduce compressor lubrication and may lead to premature failure. Too much oil in the system can puddle in the condenser and obstruct the flow of refrigerant, causing a drop in cooling performance.
Evacuation Procedures
After the compressor has been installed and the hoses are reconnected, the A/C system must be thoroughly evacuated with a vacuum pump to pull out air and moisture. If not purged from the system, air will reduce cooling efficiency. Moisture will react with refrigerant oil and produce acids and sludge. Moisture also can freeze and plug the expansion valve, causing noise, restrictions or a complete blockage.
A pump capable of achieving high vacuum must be used to pull out all of the contaminants. When air is pulled out of the system, it creates a vacuum that causes residual moisture to boil and evaporate. For this to occur, the vacuum pump must be capable of pulling at least 29 in. Hg of vacuum throughout the evacuation process (which normally takes about 30 minutes).
One of the best ways to monitor the evacuation process is with a Thermistor Vacuum Gauge that reads in microns (one inch of mercury equals 25,400 microns). It takes a highly accurate instrument to measure vacuum because even a little pressure left in the system can prevent all of the residual moisture from boiling out. Only a 1/2 inch of mercury of pressure (12,700 microns) can reduce the boiling point of water by more than 20

