If an exhaust sensor is seized in the exhaust manifold/catalyst/front tube, perform the service procedure to remove the sensor and prevent unnecessary replacement of the exhaust manifold/catalyst/front tube. In most cases, this procedure is successful because the threads of the exhaust sensors are made of a softer material than the part they thread into on the exhaust manifold/catalyst/front tube.
This procedure can be performed in two ways:
Method 1
If the sensor can be easily accessed:
• The procedure can be performed on the vehicle.
• The exhaust manifold/catalyst/front tube will not have to be removed.
Method 2
If the sensor cannot be easily accessed:
• The exhaust manifold/catalyst/front tube must be removed from the vehicle.
• The procedure will be performed with the part clamped in a vice.
Notes:
• The following service procedure is for Method 2. Method 1 is the same as Method 2 except that it’s performed on the vehicle.
• You’ll need Nissan Rust Penetrant or equivalent.
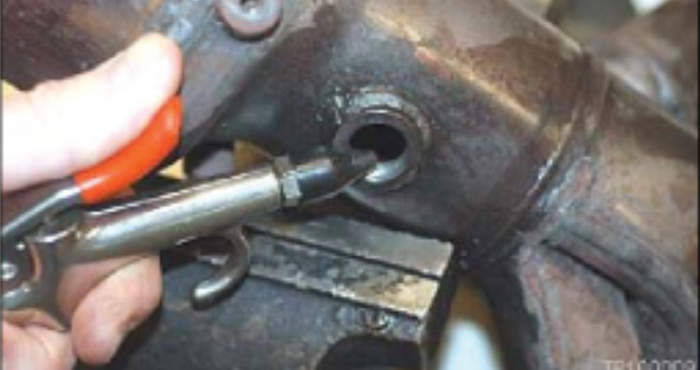
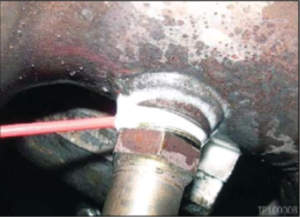
• When removing a seized exhaust sensor with a specialty socket, which contains a slit for the wiring harness, it may spread open and strip the sensor. To avoid this, cut the harness from the sensor and use a box end wrench or 6-point deep well socket. (See Fig. 1)
Service Procedure:
1. Clamp the exhaust manifold/catalyst/front tube in a vice.
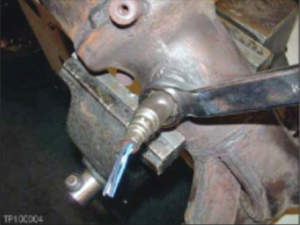
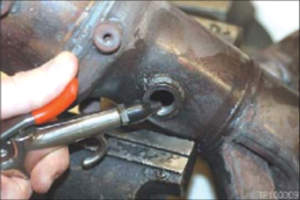
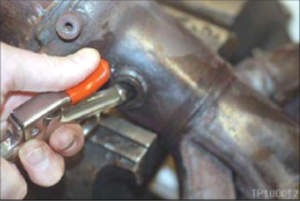
2. Spray the sensor with the rust penetrant for 2 to 3 seconds. The spray needs to be directed at the base of the sensor to ensure it penetrates into the threads (See Fig. 2).

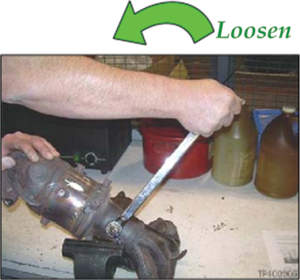
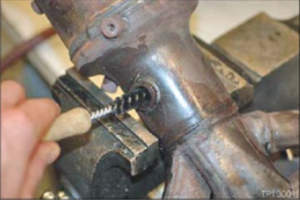
3. Loosen the sensor approximately 10º (See Fig. 3).
4. Spray with rust penetrant again for 2 to 3 seconds.
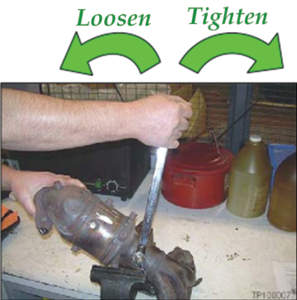
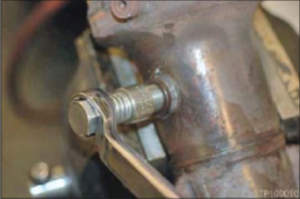
5. Tighten the sensor 10º, then loosen the sensor 10º. Repeat this motion several times until the sensor begins to turn more easily (See Fig. 4).
6. Continue the tight-ening/loosening motion while gradually unscrewing the sensor. Stop when the sensor will not unscrew any farther.
7. Spray with rust penetrant again for 2 to 3 seconds (See Fig. 5).
8. Repeat steps 6 and 7 until the sensor is removed.
9. Use compressed air to remove any metal debris from inside the boss threads (See Fig. 6). Caution: Do not perform this step if the Method #1 procedure is being done on the vehicle. Doing so may cause metal debris to enter the engine cylinders.
10. If metal debris remains trapped in the boss threads, use a spiral nylon brush to remove it (See Fig. 7).
11. Spray the boss threads with rust penetrant for 2 to 3 seconds.
12. Run a thread chaser through the boss to clean the threads (See Fig. 8).
13. Use compressed air to remove any remaining debris (See Fig. 9). Caution: Do not perform this step if the Method #1 procedure is being done on the vehicle.
14. If metal debris remains trapped in the boss threads, use a spiral nylon brush to remove it.
15. Tilt the manifold/catal-yst/front tube so that the metal debris falls out of the part.
16. Apply compressed air through the boss to blow out any remaining debris. Caution: Do not perform this step if the Method #1 procedure is being done on the vehicle.
17. Install the new sensor as described in the applicable electronic service manual (ESM).