If you went to the doctor for a routine examination, and he pulled out some heavy-duty medical instruments right away, you might get a little scared that fixing your ailment might be worse than the ailment itself. The same is true for ball joints and tie rods. Any OEM- or suspension component manufacturer-recommended procedure for inspecting a ball-type joint indicates that your hands are the best tools for getting the job done rather than using tools like a pry bar or a set of pliers.
BALL JOINTS
Techs may have a problem locating valid specs for ball joint testing. Often, a manufacturer’s warranty tolerances are too liberal for real-world alignment situations. In other cases, a manufacturer leaves the issue to the tech’s individual judgment. This allows for consideration of the real-world effects that cumulative bushing and ball joint wear have on the steering and suspension system as a whole. If you use a pry bar and brute strength, your inspection could be influenced by the bushings in the control arms. If you use a set of water pump pliers to compress a tie rod, it will give you a false reading almost every time and will not measure wear on some types of tie rods.
Boot seal designs and materials have improved over the past two decades. But, they are still prone to damage. If you see a damaged boot, chances are the stud and internal surfaces are already damaged. Wear occurs when water and small bits of debris make their way past the boot. Damage can also be accelerated when the grease escapes and leaves the joint dry. Most of the OE joints don’t have a Zerk fitting, so the debris can’t be flushed out of the joint.
Some ball joints that are equipped with a grease fitting use the fitting as a wear indicator. If a grease gun will not couple to the fitting, the joint needs to be replaced. As the joint wears, the Belleville washer or spring maintains the tension on the bearings to maintain zero axial end play as the control arms move. Lateral wear causes the ball stud to move inside the bearing and can affect camber and tire wear. The Belleville washer or spring will not compensate for lateral wear.
INSPECTION
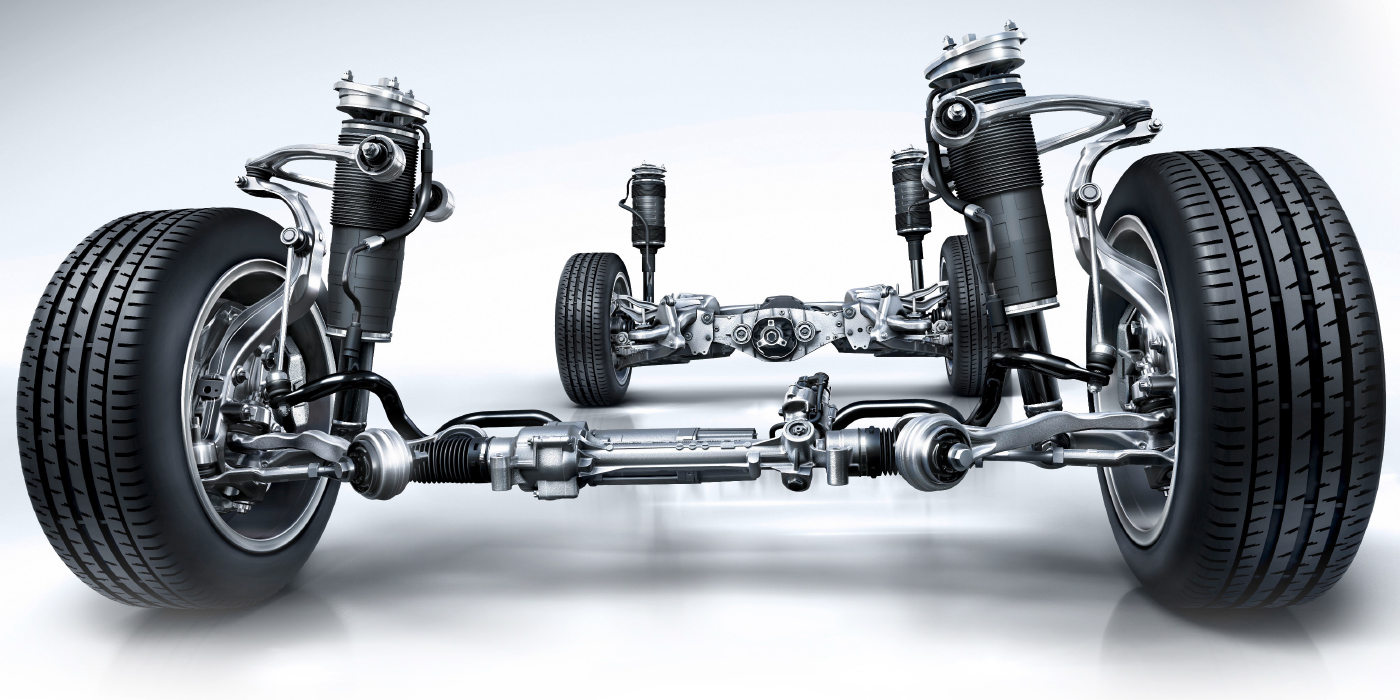
Loaded Joint: To check a loaded ball joint, place a jack or jack stand under the lower control arm to support the weight of the vehicle. Attach a dial indicator to the lower control arm and locate the dial in a vertical position to measure axial runout at the steering knuckle. Moving the steering knuckle can help check lateral runout. The upper joint is loaded in a SLA suspension that has the coil spring over the top arm. To check the joint, support the upper control arm to unload the joint. If the ball joint has a built-in wear indicator, joint play should be checked while the vehicle is on its wheels.
Follower Joint: To assess a follower-type joint, the Belleville washer or spring is loaded or compressed to check for axial end play. For a strut-type suspension, place a jack stand under the cradle to allow the strut to fully extend. Attach the dial indicator clamp to the lower control arm and locate the dial in a vertical position to measure axial runout at the steering knuckle. Place a jack under the ball joint and load the joint by raising the jack. Turn the steering wheel and observe the ball joint to check lateral runout.
For a SLA suspension, the upper control arm can be blocked and the joint can be compressed. Attach a dial indicator to the steering knuckle and locate it in a vertical or parallel position to measure axial runout at the lower control arm. Moving the steering knuckle can check lateral runout.
The overall condition of the chassis is important to the safety and performance of the vehicle, so heed the specifications for alignment, ride height and ball joint end play.
Tie Rod Inspection By The Numbers
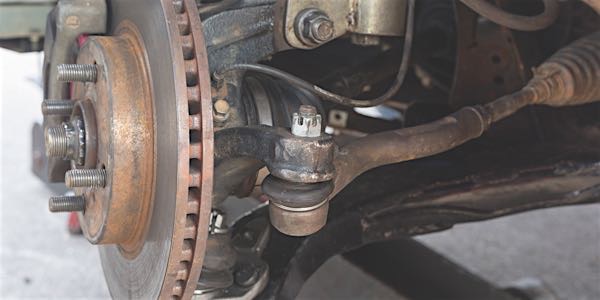
1. Check the outer tie rod ends by grasping by hand and pushing up and down. Do not use a pry bar. If any free play is observed in a joint, it is worn and should be replaced.
2. While the vehicle is on the ground or on a drive-on hoist, have an assistant rotate the steering wheel rapidly back and forth from 10 o’clock to 10 o’clock while observing the inner and outer tie rods. If the outer tie rod ends have any vertical movement or the inner tie rod ends have any horizontal movement, the tie rod end with the observed movement should be replaced.
3. Raise the vehicle and remove the front wheels. The wheels will need to be turned to the right to inspect the passenger-side inner tie rod end and to the left to inspect the driver-side inner tie rod end. Inspect all four seals for tears, perforations and wear. If there is any indication of wear or perforations on the seal, that tie rod end should be replaced.
4. Stud Corrosion: Using a putty knife or other hard, flat, dull object, lift the bottom of the seal up, exposing the stud. If any water escapes from the seal in the form of bubbles or a liquid, that tie rod end should be replaced. Closely examine the stud for signs of corrosion, especially around the knuckle.
If you find play at the inner tie rod, confirm that it’s the joint that is worn, and not a rack bushing. If the rack boot allows, squeeze it to feel that the joint is the problem and the rack isn’t loose and moving around in the housing. This will also give you an indication if the rack boot needs to be replaced. It’s always a good practice to replace the boot, but you may find that it’s easier to obtain a tie rod end rather than a direct-fit boot.
With outer joints, make a note of the length of the rod before the end is removed in order to get the toe in the ballpark on reassembly. Many techs simply count the turns when the rod is removed, but a measurement from the center of the joint to a known point is a good backup. Either way, be sure the toe is within spec before the car is returned.